 Kia Rio: Inspection
| [Rotor] |
| 1. |
Check that there is continuity between the slip rings (C).
|
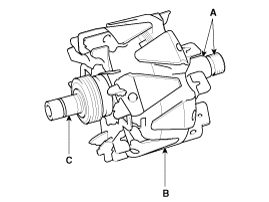
| 2. |
Check that there is no continuity between the slip rings and the
rotor (B) or rotor shaft (A).
|
| 3. |
If the rotor fails either continuity check, replace the alternator.
|
| [Stator] |
| 1. |
Check that there is continuity between each pair of leads (A).
|
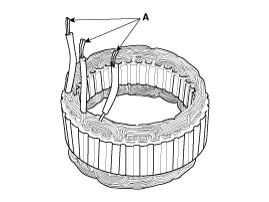
| 2. |
Check that there is no continuity between each lead and the coil
core.
|
| 3. |
If the coil fails either continuity check, replace the alternator.
|
Drive belt tension measurement and adjustment
| Belt tension measurement |
Measure the belt tension using a mechanical tension gauge or a sonic tension
meter.
Tension
[Without OAD]
New belt: 882.6 ~ 980.7N (90 ~ 100kg, 198.4 ~ 220.5lb)
Used belt: 637.4 ~ 735.5N (65 ~ 75kg, 143.3 ~ 165.3lb)
[With OAD]
New belt: 686.5 ~ 784.5N (70 ~ 80kg, 154.3 ~ 176.4lb)
Used belt: 490.3 ~ 588.4N (50 ~ 60kg, 110.2 ~ 132.3lb)
|
|

| Using a mechanical tension gauge (BT-33-73F, BTG-2 type) |
| 1. |
While pressing the handle (A) of the gauge, insert the belt (B)
between pulley and pulley (or idler) into the gap between spindle (C)
and hook (D).
|
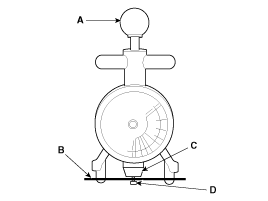
| 2. |
After releasing the handle (A), read a value on the dial pointed
by the indicator (B).
|
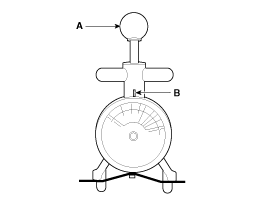
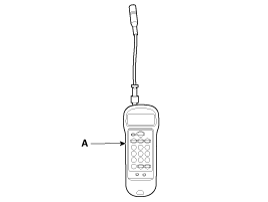
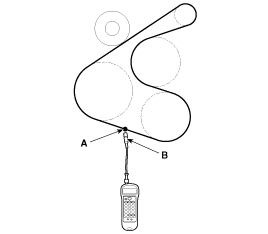
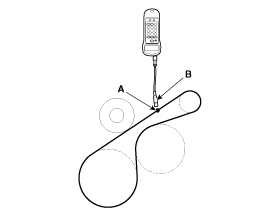
| Using a sonic tension meter (U-505/507 type) |
| 1. |
Input the belt specifications into the tension meter.
|
||||||||||||||||||||||

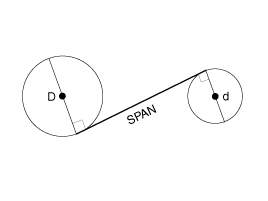
| 2. |
Locate the micro phone (B) close to the center of belt span (A)
and bounce the belt by finger 2~3 times. Read a value on the display.
[With A/C]
[Without A/C]
|
| If adjustment is necessary: |
| 1. |
Loosen the mounting bolts (A).
|
| 2. |
Tighten the adjusting bolt(B) clockwise in loose tension ; loosen
the bolt counterclockwise in high tension.
|
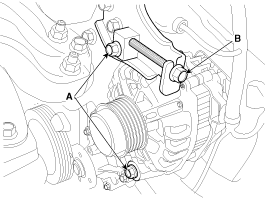
| 3. |
Recheck tension of the belt.
|
| 4. |
After adjusting tension, tighten the through bolts.
|
 Reassembly
1.
Reassemble in the reverse order of disassembly.
ŌĆó
...
 DC DC Converter
...
See also:
Multimedia Jack Removal
1.
Using a screwdriver or remover, remove the multimidia jack assembly.
...
Driver Airbag (DAB) Module and Clock Spring Components
1. Driver Airbag (DAB)
2. Steering Wheel
3. Clock Spring
...
Manual transaxle
Manual transaxle operation
The manual transaxle has 6 forward gears.
This shift pattern is imprinted on the shift knob. The transaxle is fully synchronized
in all forward gears so shifting to ei ...
Categories
- Kia Rio Manuals Home
- Kia Rio YB 2017-2026 Owners Manual
- Kia Rio YB 2017-2026 Service Manual
- Kia Rio UB 2012-2017 Owners Manual
- Kia Rio UB 2012-2017 Service Manual
- Downloads

Copyright ® www.kirmanual.com 2014-2026