 Kia Rio: Console Replacement
Floor Console Replacement
| [M/T] |
|

| 1. |
Using a screwdriver or remover, remove the gear boots (A).
|

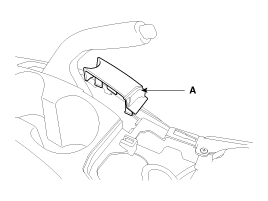
| 2. |
Using a screwdriver or remover, remove the console upper cover
(A).
|
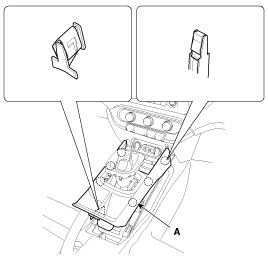
| 3. |
Using a screwdriver or remover, remove the parking brake cover
(A).
|
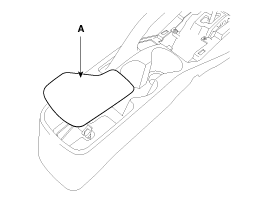
| 4. |
Remove the floor console pad (A).
|
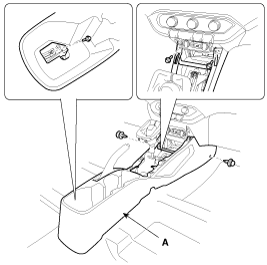
| 5. |
After loosening the mounting bolts and clips, then remove the
floor console assembly (A).
|
| 6. |
Installation is the reverse of removal.
|

| [A/T] |
|
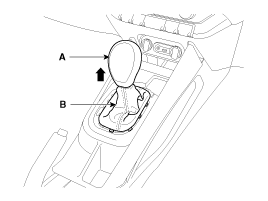
| 1. |
Using a screwdirver or remover, remove the gear boots (B) and
gear knob (A).
|
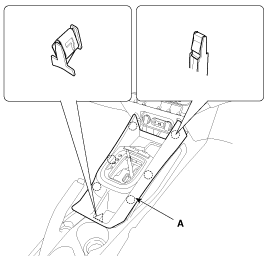
| 2. |
Using a screwdriver or remover, remove the console upper cover
(A).
|
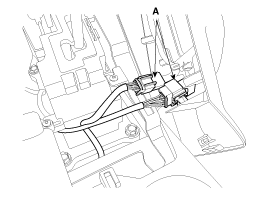
| 3. |
Disconnect the connectors (A).
|
| 4. |
Using a screwdriver or remover, remove the parking brake cover
(A).
|
| 5. |
Remove the floor console pad (A).
|
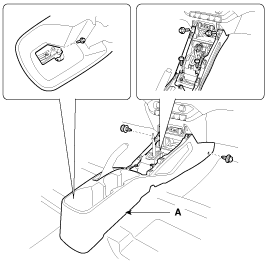
| 6. |
After loosening the mounting bolts, screws, clips, then remove
the floor console assembly (A).
|
| 7. |
Installation is the reverse of removal.
|
 Console Components
1 . Floor console assembly
2 . Console upper cover [M/T]
3 . Console upper cover [A/T]
4. Potable ash tray
5 . Parking brake cover
6 . Floor console pad
...
 Crash Pad Components
(1)
1 . Main crash pad assembly
2 . Crash pad side cover [LH]
3 . Crash pad side cover [RH]
4 . Fuse box cover
5 . Crash pad lower panel
6 . Knee bolster panel
7 . St ...
See also:
Auto Defogging Sensor (FATC only) Inspection
1.
Press the MODE switch more then 4 times within 2 seconds while
pressing the OFF switch.
Display
Fail description
00 ...
Manual Transaxle Components
1. Transaxle support mounting bracket
2. Control shaft complete
3. Back up lamp switch
4. Vehicle speed sensor
...
Checking Cables And Wires
1.
Check the terminal for tightness.
2.
Check terminals and wires for corrosion from battery electrolyte,
etc.
3.
...
Categories
- Kia Rio Manuals Home
- Kia Rio YB 2017-2026 Owners Manual
- Kia Rio YB 2017-2026 Service Manual
- Kia Rio UB 2012-2017 Owners Manual
- Kia Rio UB 2012-2017 Service Manual
- Downloads

Copyright ® www.kirmanual.com 2014-2026