 Kia Rio: Front Stabilizer Bar Replacement
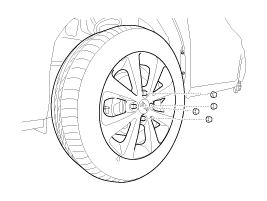
| 1. |
Remove the front wheel & tire.
|

| 2. |
Disconnect the stabilizer link with the front strut assembly after
loosening the nut.
|

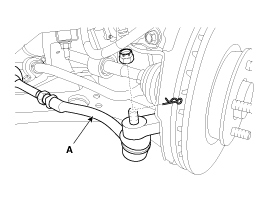
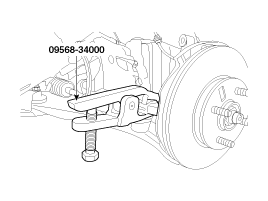
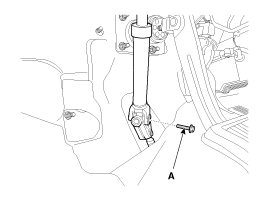
| 3. |
Loosen the nut and then remove the tie-rod end (A) with the front
axle by using SST(09568-34000).
|
| 4. |
Loosen the nut and then remove the lower arm (A).
|
| 5. |
Loosen the bolt (A) and then disconnect the universal joint assembly
from the pinion of the steering gear box.
|
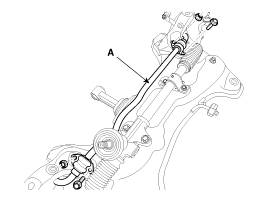
| 6. |
Remove the rubber hanger (A).
|
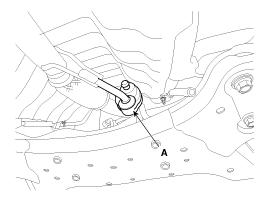
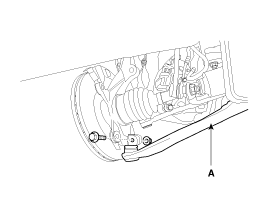
| 7. |
Loosening the roll rod (A) mounting bolts and nuts.
|
| 8. |
Loosen the bolts & nuts and then remove the front sub frame (A).
|
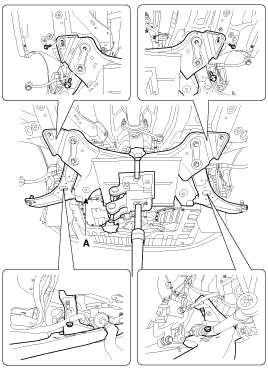
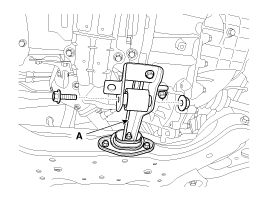
| 9. |
Remove the stabilizer (A) from the front sub frame by loosening
the mounting bolts & nuts.
|
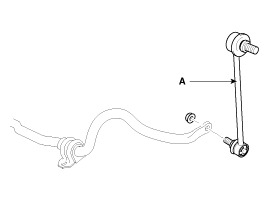
| 10. |
Disconnect the stabilizer link (A) with the stabilizer bar by
loosening the nut.
|
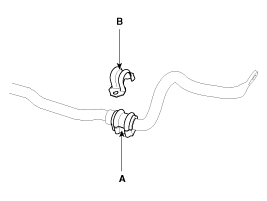
| 11. |
Remove the bushing (A) and the clamp (B) from the stabilizer bar.
|
| 12. |
Installation is the reverse of removal.
|
 Front Stabilizer Link Inpesction
Check the front stabilizer link ball joint for damage.
-
┬Ł Torn boot
-
┬Ł Opened boot
-
┬Ł Displaced ring
...
 Front Stabilizer Bar Inspection
1.
Check the bushing for wear and deterioration.
2.
Check the front stabilizer bar for deformation.
3.
Check th ...
See also:
Trunk Trim Replacement
ŌĆó
Put on gloves to protect your hands.
ŌĆó
...
Inspection
1.
Turn the ignition switch OFF.
2.
Disconnect the CCV connector.
3.
Measure resistance between the CCV termina ...
Inhibitor Switch Description
Inhibitor Switch monitors the lever's position(PRND) and is used to control
gear setting signals.
...
Categories
- Kia Rio Manuals Home
- Kia Rio YB 2017-2026 Owners Manual
- Kia Rio YB 2017-2026 Service Manual
- Kia Rio UB 2012-2017 Owners Manual
- Kia Rio UB 2012-2017 Service Manual
- Downloads

Copyright ® www.kirmanual.com 2014-2026