 Kia Rio: Muffler: Removal and Installation
| 1. |
Disconnect the battery negative terminal.
|
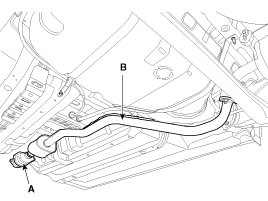
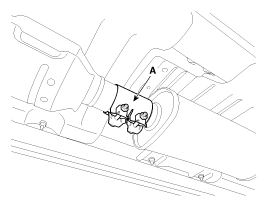
| 2. |
Disconnect the rear oxygen sensor connector (A).
|

| 3. |
Remove the front muffler (A).
|
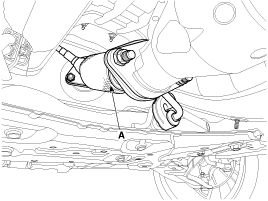
| 4. |
Remove the center muffler (A).
|

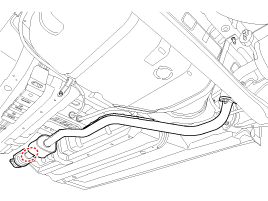
| 5. |
Remove the main muffler (A).
|

| 6. |
Installation is the reverse order of removal.
|

Replacement procedure of center muffler using clamp
Under warranty : Replace the center muffler assembly.
Out of warranty : It is available to replace the center muffler as the
procedure below.
| 1. |
Check that the clamping part of the center muffler assembly is
damaged or deformed.
If the muffler is too corroded to clamp, replace the center muffler
assembly.
|
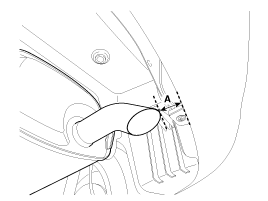
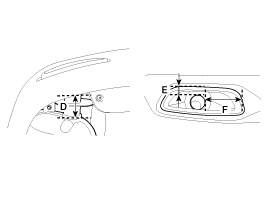
| 2. |
Record the gap (A, B, C, D, E, F) between the tail pipe (or tail
trim) and the rear bumper.
[Pipe type]
[Trim type]
[Bumper-integrated trim type]
|

| 3. |
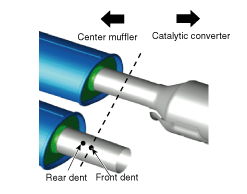
Remove the catalytic converter & center muffler (A).
|
| 4. |
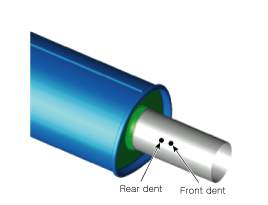
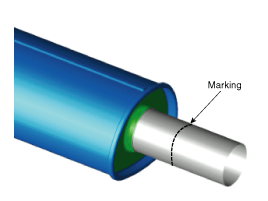
Cut the center muffler as the instruction below.
[With dent]
[Without dent]
[A/S muffler]
|


| 5. |
Install the center muffler.
|
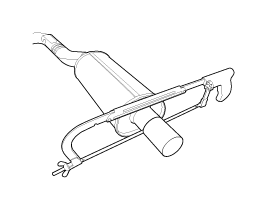
 Muffler: Components
1. Front muffler
2. Catalytic converter & Center muffler assembly
3. Main muffler
4. Gasket
5. Hanger
...

See also:
Replacement
The injector combustion seal should be replaced new one to prevent leakage
after removing the injector.
1.
Remove the combustion seal (A) with a wire cutter.
...
Front Wiper Motor Component Location
1. Cap
2. Nut
3. Wiper arm & blade
4. Rivet
5. Cowl top cover
6. Bolt
7. Wiper motor & linkage assembly
...
Inspection
Cylinder Head
1.
Inspect for flatness.
Using a precision straight edge and feeler gauge, measure the
surface the contacting the cylinder block and the manifolds ...
Categories
- Kia Rio Manuals Home
- Kia Rio YB 2017-2026 Owners Manual
- Kia Rio YB 2017-2026 Service Manual
- Kia Rio UB 2012-2017 Owners Manual
- Kia Rio UB 2012-2017 Service Manual
- Downloads

Copyright ® www.kirmanual.com 2014-2026