 Kia Rio: Rear Seat Belt Replacement
Rear Seat Belt Replacement
| [5 Door] |
|

| 1. |
Remove the following items first :
|
| 2. |
Using a screwdriver or remover, remove the rear transverse trim
(A).
|

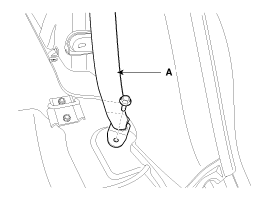
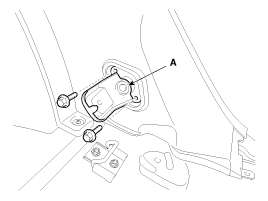
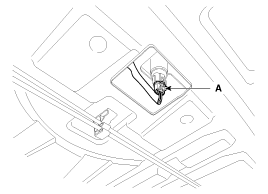
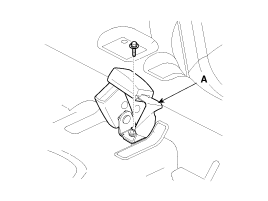
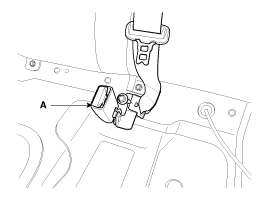
| 3. |
After loosening the mounting bolt, then remove the rear seat belt
lower anchor (A).
|
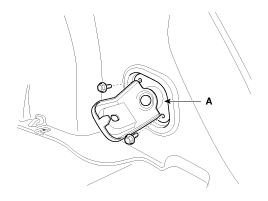
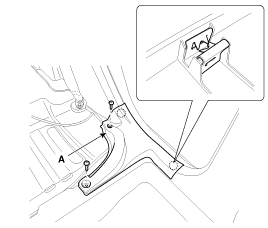
| 4. |
After loosening the mounting blots, then remove the rear seat
bracket (A).
|
| 5. |
Using a screwdriver or remover, remove the lamp (A).
|
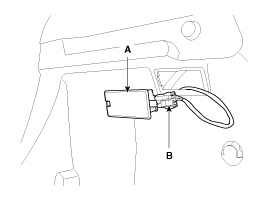
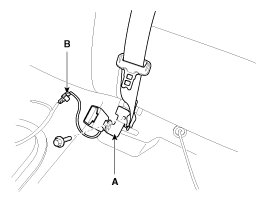
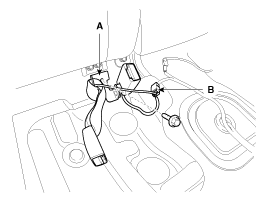
| 6. |
Disconnect the lamp connector (B).
|
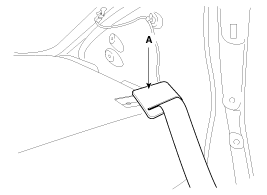
| 7. |
After loosening the mounting screws, then remove the luggage side
trim (A).
|
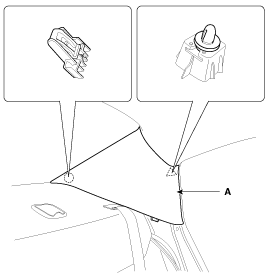
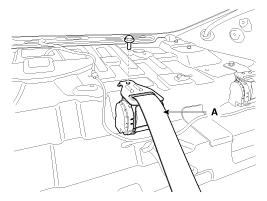
| 8. |
Remove the rear seat belt upper anchor cover (B).
|
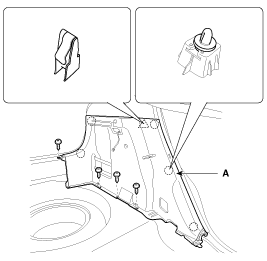
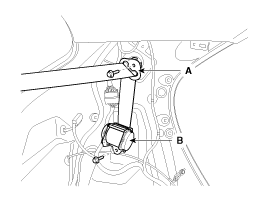
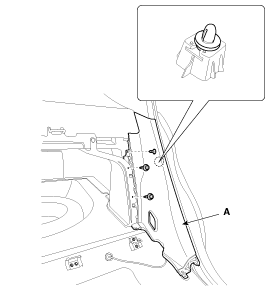
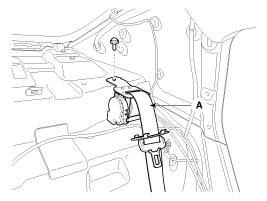
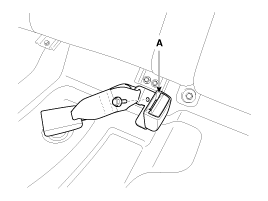
| 9. |
Using a screwdriver or remover, remove the rear pillar trim (A).
|

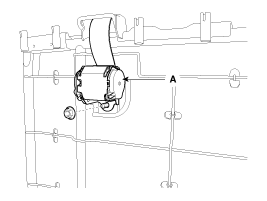
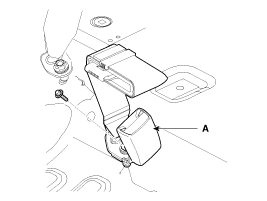
| 10. |
After loosening the mounting bolt, then remove the rear seat belt
(A) and rear seat belt retractor (B).
|
| 11. |
Installation is the reverse of removal.
|

| [4 Door] |
|
| 1. |
Remove the rear seat assembly.
(Refer to the BD group ŌĆō ŌĆ£Rear SeatŌĆØ)
|
| 2. |
Using a screwdriver or remover, remove the rear pillar trim (A).
|
| 3. |
After loosening the mounting screws, then remove the rear door
scuff trim (A).
|
| 4. |
After loosening the mounting bolt, then remove the rear seat belt
lower anchor (A).
|

| 5. |
After loosening the mounting blots, then remove the rear seat
folding bracket (A).
|
| 6. |
After loosening the mounting clips and screws, then remove the
luggage partition trim (A).
|

| 7. |
After loosening the mounting clips and screw, then remove the
rear wheel housing trim (A).
|
| 8. |
Disconnect the high mounted stop lamp connector (A).
|
| 9. |
Remove the rear seat belt upper anchor cover (A).
|
| 10. |
Remove the rear package tray trim (A).
|
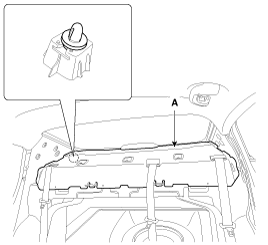
| 11. |
After loosening the retractor (B) mounting bolts, then remove
the rear seat belt (A).
[LH, RH]
[Center]
|
| 12. |
Installation is the reverse of removal.
|
Center Rear Seat Belt
| [5 Door] |
| 1. |
Remove the following items first :
|
| 2. |
After loosening the mounting nut, then remove the center rear
seat belt retractor (A).
|
| 3. |
Installation is the reverse of removal.
|
Rear Seat Belt Buckle Replacement
| 1. |
Remove the following items first :
|
| 2. |
Disconnect the rear seat buckle connector (B).
|
| 3. |
After loosening the mounting bolt, then remove the rear seat belt
buckle (A).
[LH]
[A Type]
[B Tyep]
[C Tyep]
[RH]
[A Type]
[B Tyep]
[C Tyep]
|
| 4. |
Installation is the reverse of removal.
|
 Front Seat Belt Replacement
Front Seat Belt Replacement
ŌĆó
When installing the belt, make sure not to damaged the
...

See also:
Inspection
1.
Check the brake tubes for cracks, crimps and corrosion.
2.
Check the brake hoses for cracks, damage and fluid leakage.
3 ...
TPMS Receiver Diagnosis procedure by using diagnostic device
As manual for diagnosis methods by using diagnosis device, the main contents
are as follows:
1.
Connect self-diagnosis connector(16pins) located in the lower
of driv ...
Inspection
1.
Check the bushing for wear.
2.
Check the brake pedal for bending or twisting.
3.
Check the brake pedal retur ...
Categories
- Kia Rio Manuals Home
- Kia Rio YB 2017-2026 Owners Manual
- Kia Rio YB 2017-2026 Service Manual
- Kia Rio UB 2012-2017 Owners Manual
- Kia Rio UB 2012-2017 Service Manual
- Downloads

Copyright ® www.kirmanual.com 2014-2026