 Kia Rio: Removal
|

Mark all wiring and hoses to avoid misconnection.
|

In case of removing the high pressure fuel pump, high pressure
fuel pipe, delivery pipe, and injector, there may be injury caused by
leakage of the high pressure fuel. So donŌĆÖt do any repair work right
after engine stops.
|

| 1. |
Remove the engine cover.
|
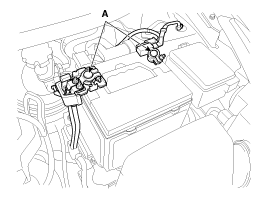
| 2. |
Disconnect the battery negative terminal (A).
|
| 3. |
Remove the air cleaner assembly.
|
| 4. |
Remove the RH front wheel.
|
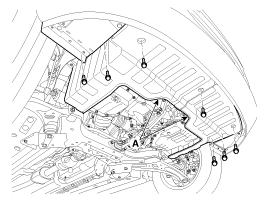
| 5. |
Remove the under covers (A).
|
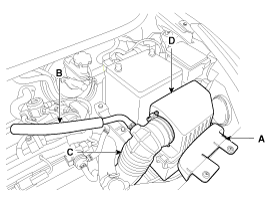
| 6. |
Disconnect the A/C compressor switch connector (A), the alternator
connector (B) and the cable from the alternator ŌĆ£BŌĆØ terminal (C).
|
| 7. |
Disconnect the intake OCV (Oil control valve) connector (A) and
the exhaust OCV (Oil control valve) connector (B).
|

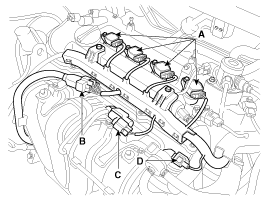
| 8. |
Disconnect the ignition coil connectors (A), the injector extension
connector (B), the VIS (Variable intake system) connector (C) and the
PCSV (Purge control solenoid valve) connector (D).
|
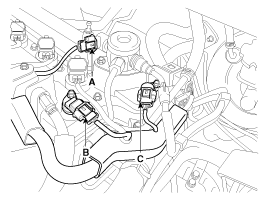
| 9. |
Disconnect the FPCV (Fuel pressure control valve) connector (A),
the intake CMPS (Camshaft position sensor) connector (B) and the exhaust
CMPS (Camshaft position sensor) connector (C).
|
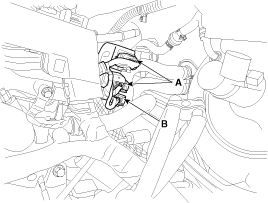
| 10. |
Disconnect the oxygen sensor connectors (A) and the condenser
connector (B).
|
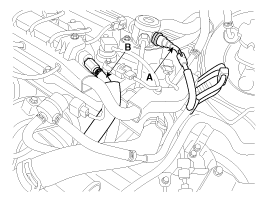
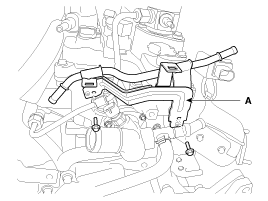
| 11. |
Disconnect the fuel hose (A) and the PCV (Positive crankcase ventilation)
hose (B).
|
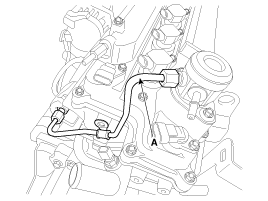
| 12. |
Remove the vacuum pipe assembly (A).
|
| 13. |
Remove the high pressure pipe (A). (Refer to FL group)
|
| 14. |
Remove the high pressure fuel pump (A) and the roller tappet (B).
(Refer to FL group)
|

| 15. |
Remove the ignition coils (A).
|

| 16. |
Remove the exhaust OCV (Oil control valve) (B).
|

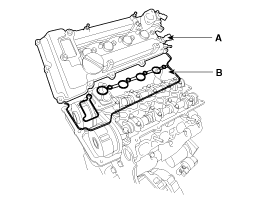
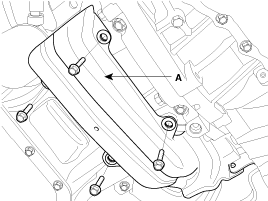
| 17. |
Remove the cylinder head cover (A) with gaskets (B).
|
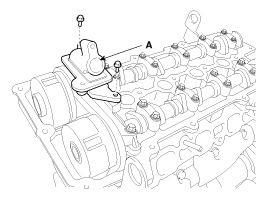
| 18. |
Remove the exhaust OCV (Oil control valve) adapter (A).
|
| 19. |
Loosen the water pump pulley bolt and the drive idler mounting
bolt.
|
| 20. |
Loosen the alternator tension adjusting bolt (A) to loosen tension.
|
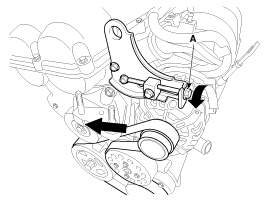
| 21. |
Remove the alternator drive belt (A).
|

| 22. |
Remove the alternator (A). (Refer to Altemator in EE Group).
|

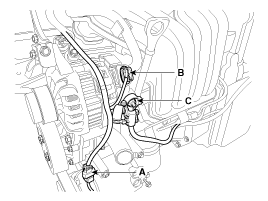
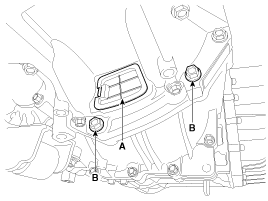
| 23. |
Disconnect the ground line (A) and then remove the engine mounting
support bracket (A).
|
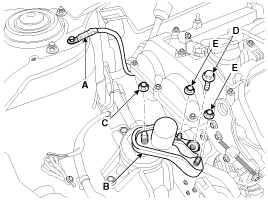
| 24. |
Remove the alternator bracket (B).
|
| 25. |
Remove the engine support bracket (A).
|
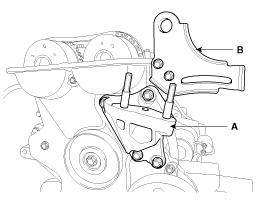
| 26. |
Remove the water pump pulley (A) and the drive belt idler (B).
|
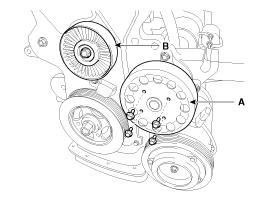
| 27. |
Remove the water pump (A).
|

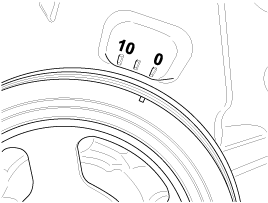
| 28. |
Turn the crankshaft pulley clockwise, and align its groove with
the timing mark of the timing chain cover.
|
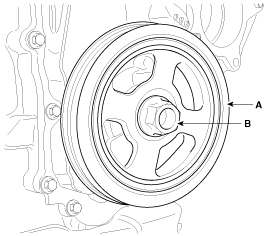
| 29. |
Remove the crankshaft bolt (B) and crankshaft pulley (A).
|

| 30. |
Remove the timing chain cover (A).
|

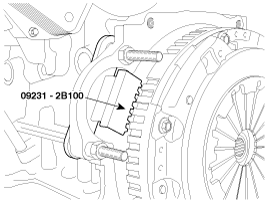
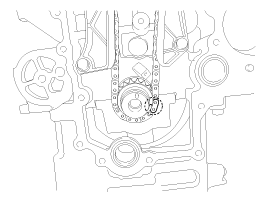
| 31. |
Align the timing marks of the Continuous variable valve timing
(CVVT) sprockets with the upper surface of the cylinder head to make
No.1 cylinder be positioned at top dead Center (TDC).
|

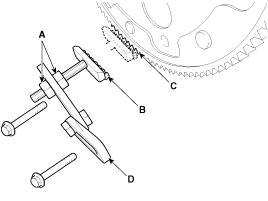
| 32. |
Remove the hydraulic tensioner (A).
|

| 33. |
Remove the timing chain tensioner arm (A) and guide (B).
|
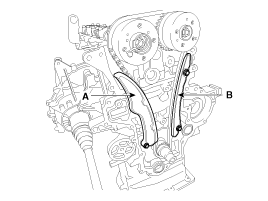
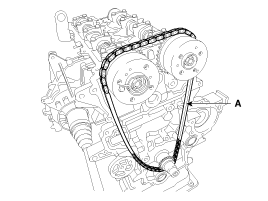
| 34. |
Remove the timing chain (A).
|
 Components
1. Timing chain
2. Timing chain guide
3. Timing chain arm
4. Timing chain auto tensionr
5. Timing chain cover
6. Drive belt idler
7. Water pump gasket
8. Water pump
...
 Inspection
Sprockets, Hydraulic Tensioner, Chain
Guide, Tensioner Arm
1.
Check the CVVT sprocket, crankshaft sprocket teeth for abnormal
wear, cracks or damage. Repla ...
See also:
TPMS Receiver Replacement
When the receiver first arrives for replacement:
1)
It will be in Virgin State.
...
Ignition Switch Assembly Installation
1.
Install the key lock cylinder.
When assembling, the key must be insert ...
DC/DC Converter: Circuit Diagram
In the ISG mode, if the power of an audio system turnsOFF by drawdown
while ŌĆ£Auto StartingŌĆØ or ŌĆ£Idle StartingŌ ...
Categories
- Kia Rio Manuals Home
- Kia Rio YB 2017-2026 Owners Manual
- Kia Rio YB 2017-2026 Service Manual
- Kia Rio UB 2012-2017 Owners Manual
- Kia Rio UB 2012-2017 Service Manual
- Downloads
