 Kia Rio: Rear Hub - Carrier Replacement
| [Drum Type] |
| 1. |
Remove the rear wheel & tire.
|
| 2. |
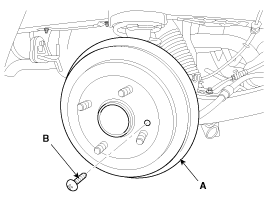
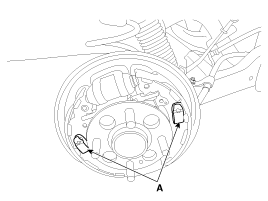
Loosen the screw (A) and then remove the disc (B).
|
| 3. |
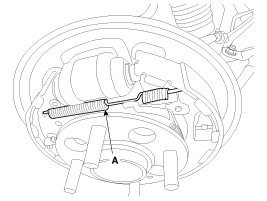
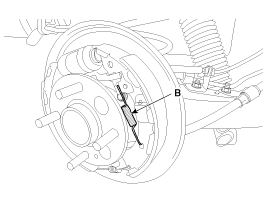
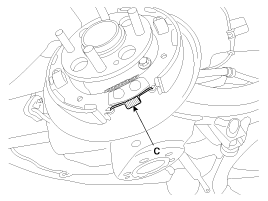
Remove the spring (A, B, C).
|
| 4. |
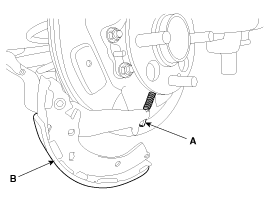
Remove the shoe (A).
|
| 5. |
Disconnect the parking brake cable (A) from lining (B).
|
| 6. |
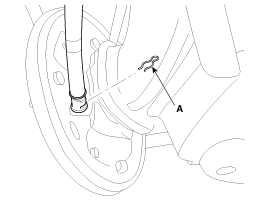
Remove the clip (A).
|
| 7. |
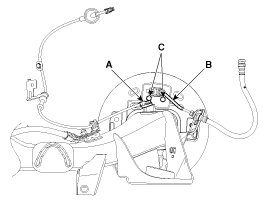
Remove the wheel speed sensor (A) & brake hose (B) from the rear
axle aseembly and then loosen the cylinder bolts (C).
|
| 8. |
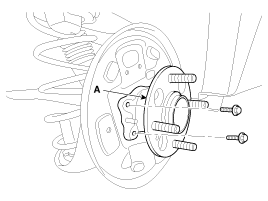
Loosen the hub mounting bolt and then remove the hub (A) from
the torsion beam.
|
| 9. |
Install in the reverse order of removal.
|
| [Disc Type] |
| 1. |
Remove the rear wheel & tire.
|
| 2. |
Remove the clip (A) and then remove the parking brake cable (B).
|
| 3. |
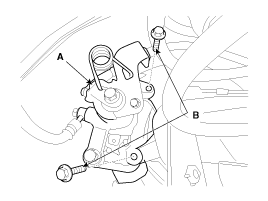
Remove the brake caliper assembly (A) from the torsion beam axle
by loosening the bolts (B).
|
| 4. |
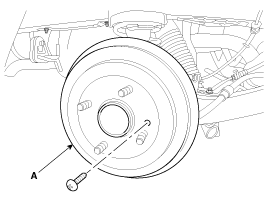
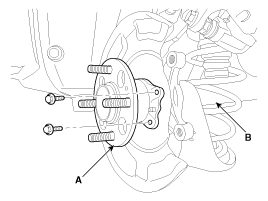
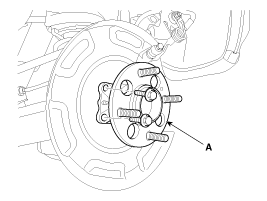
Loosen the screw and remove the disc (A).
|
| 5. |
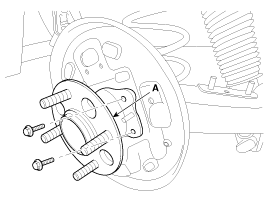
Loosen the hub mounting bolt and then remove the hub (A) from
the torsion beam (B).
|
| 6. |
Install in the reverse order of removal.
|
 Rear Hub - Carrier Components
[Drum Type]
1. Rear torsion beam assembly
2. Brake assembly
3. Rear wheel hub assembly
4. Rear brake disc
5. Rear brake disc mounting screw
...
 Rear Hub - Carrier Inspection
1.
Check the hub for cracks and the splines for wear.
2.
Check the brake disc for scoring and damage.
3.
C ...
See also:
Manual climate control system
1. Fan speed control knob
2. Mode selection knob
3. Temperature control knob
4. Air conditioning button (if equipped)
5. Rear window defroster button
6. Air intake control button
Heating and a ...
Delivery Pipe Removal
In case of removing the high pressure fuel pump, high pressure
fuel pipe, delivery pipe, and injector, there may be inju ...
Copyright ® www.kirmanual.com 2014-2026


