 Kia Rio: Steering Gear box Replacement
| 1. |
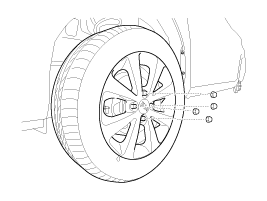
Remove the front wheel & tire.
|
| 2. |
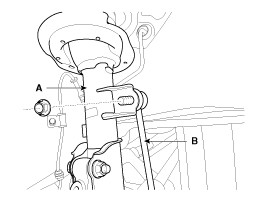
Disconnect the stabilizer link (B) with the front strut assembly
(A) after loosening the nut.
|
| 3. |
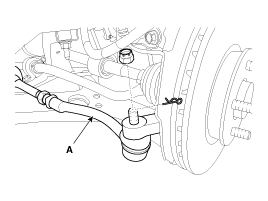
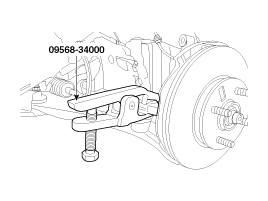
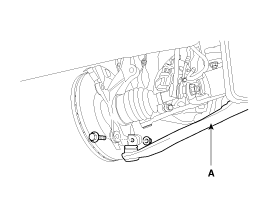
Loosen the nut and then remove the tie-rod end (A) from the front
axle by using SST(09568-34000).
|
| 4. |
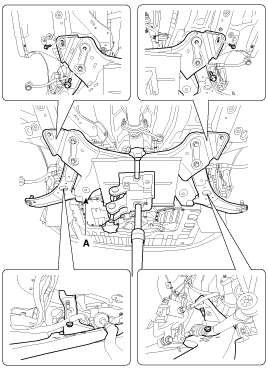
Loosen the nut and then remove the lower arm (A).
|
| 5. |
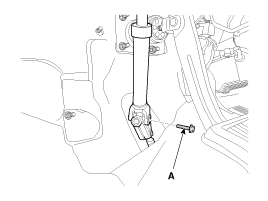
Loosen the bolt (A) and then disconnect the universal joint assembly
from the pinion of the steering gear box.
|
| 6. |
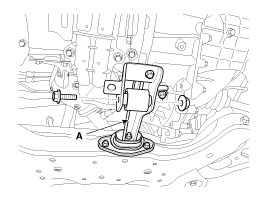
Remove the rubber hanger (A).
|
| 7. |
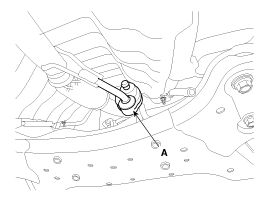
Loosening the roll rod (A) mounting bolts and nuts.
|
| 8. |
Loosen the bolts & nuts and then remove the front sub frame (A).
|
| 9. |
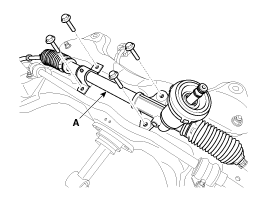
Remove steering gearbox (A) from the front sub frame by loosening
the mounting bolts.
|
| 10. |
Installation is the reverse of the removal.
|
 Steering Gear box Components
1. Tie-rod end
2. Lock nut
3. Bellows clip
4. Bellows
5. Tie rod
6. Rack bar
7. Dust packing
8. Dust cap
9. Oil seal
10. Pinion plug
11. Pinion assembl ...
 Disassembly
1.
Fix the steering gear box assembly (A) on the vice.
2.
Remove the bellows clip (A) in the direction of the arrow. (The
left and ...
See also:
Installation
1.
Connect the horn connector, then reassemble the horn.
...
Auto Light Switch Inspection
Operate the auto light switch, then check for continuity between terminals
of multi-function switch connector.
...
Hands free switch Schematic Diagrams
Circuit Diagram(1)
Circuit Diagram(2)
...
Copyright ® www.kirmanual.com 2014-2026

