 Kia Rio: Radiator: Removal and Installation
| 1. |
Disconnect the battery negative terminal.
|
| 2. |
Remove the air cleaner assembly. (Refer to Intake and exhaust
system in this group)
|
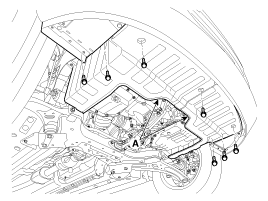
| 3. |
Remove the under covers (A).
|
| 4. |
Loosen the drain plug and drain the coolant. Open the radiator
cap to make rapid draining.
|

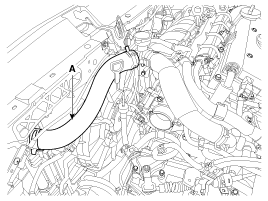
| 5. |
Remove the radiator upper hose (A) and lower hose (B).
|
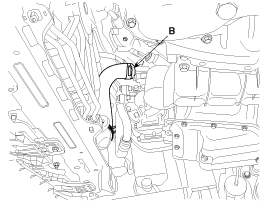

| 6. |
Disconnect the fan connector (A) and the ATF cooler hoses (B)(A/T
only). (Refer to AT group)
|

| 7. |
Remove the front bumper. (Refer to BD group)
|
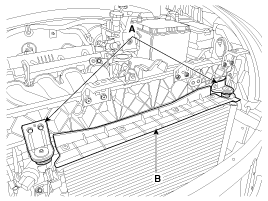
| 8. |
Remove the rail (A) and the air guard (B).
|
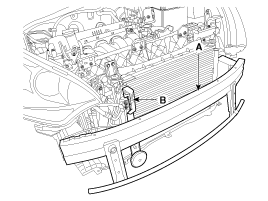
| 9. |
Remove the cover (A).
|
| 10. |
Remove the upper cover (A) and the radiator mounting brackets
(B).
|
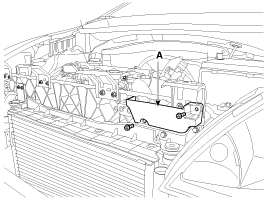
| 11. |
Remove the A/C condenser (A) from the radiator assembly and then
lift up the radiator assembly (B).
|

| 12. |
Remove the cooling fan (A) from the radiator (B).
|
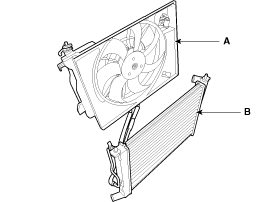
| 13. |
Installation is reverse order of removal.
|

 Radiator: Inspection
Radiator Cap Testing
1.
Remove the radiator cap, wet its seal with engine coolant, then
install it to pressure tester.
2.
Apply ...
See also:
Inspection
Steering Wheel Play Inspection
1.
Turn the steering wheel so that the front wheels can face straight
ahead.
2.
Measure the distance the ...
Driver Airbag (DAB) Module and Clock Spring Installation
1.
Set the front tires straight-ahead before assembling the steering
wheel.
...
Description
Ignition timing is controlled by the electronic control ignition timing
system.
The standard reference ignition timing data for the engine operating conditions
are pre-pro grammed in the ...
Copyright © www.kirmanual.com 2014-2024