 Kia Rio: Rear Seat Belt Replacement
Rear Seat Belt Replacement
| [5 Door] |
|

| 1. |
Remove the following items first :
|
| 2. |
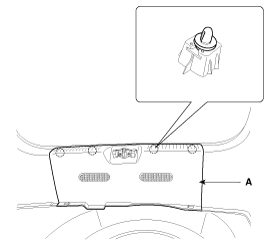
Using a screwdriver or remover, remove the rear transverse trim
(A).
|
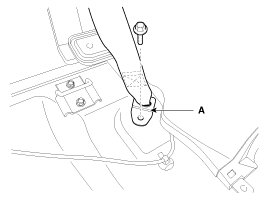
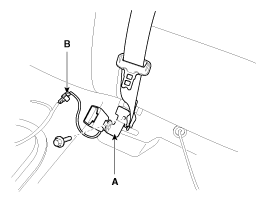
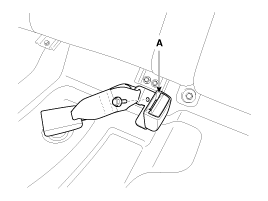
| 3. |
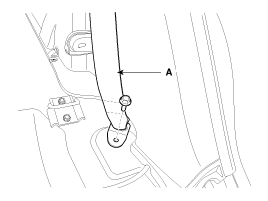
After loosening the mounting bolt, then remove the rear seat belt
lower anchor (A).
|
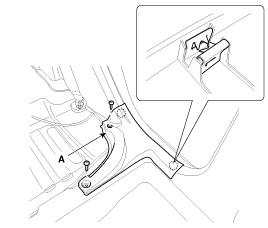
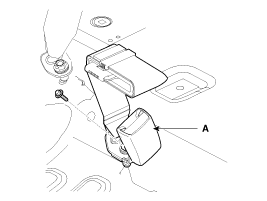
| 4. |
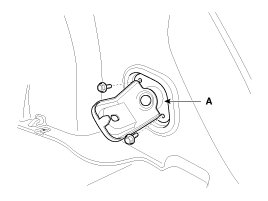
After loosening the mounting blots, then remove the rear seat
bracket (A).
|
| 5. |
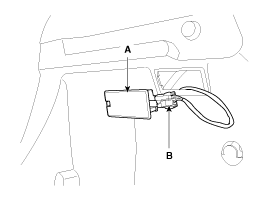
Using a screwdriver or remover, remove the lamp (A).
|
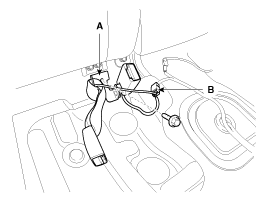
| 6. |
Disconnect the lamp connector (B).
|
| 7. |
After loosening the mounting screws, then remove the luggage side
trim (A).
|

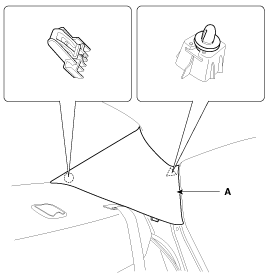
| 8. |
Remove the rear seat belt upper anchor cover (B).
|
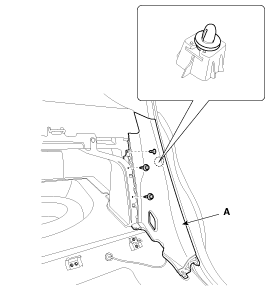
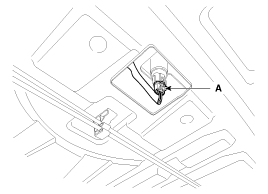
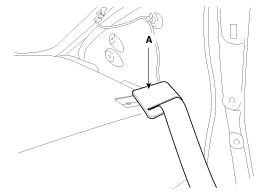
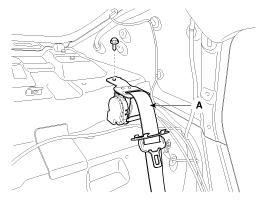
| 9. |
Using a screwdriver or remover, remove the rear pillar trim (A).
|
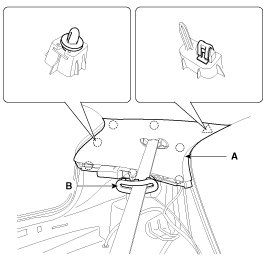
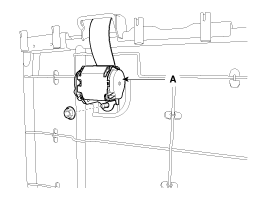
| 10. |
After loosening the mounting bolt, then remove the rear seat belt
(A) and rear seat belt retractor (B).
|

| 11. |
Installation is the reverse of removal.
|

| [4 Door] |
|
| 1. |
Remove the rear seat assembly.
(Refer to the BD group – “Rear Seat”)
|
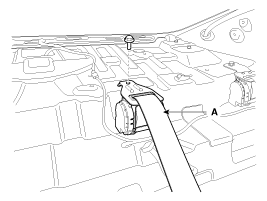
| 2. |
Using a screwdriver or remover, remove the rear pillar trim (A).
|
| 3. |
After loosening the mounting screws, then remove the rear door
scuff trim (A).
|
| 4. |
After loosening the mounting bolt, then remove the rear seat belt
lower anchor (A).
|
| 5. |
After loosening the mounting blots, then remove the rear seat
folding bracket (A).
|

| 6. |
After loosening the mounting clips and screws, then remove the
luggage partition trim (A).
|

| 7. |
After loosening the mounting clips and screw, then remove the
rear wheel housing trim (A).
|
| 8. |
Disconnect the high mounted stop lamp connector (A).
|
| 9. |
Remove the rear seat belt upper anchor cover (A).
|
| 10. |
Remove the rear package tray trim (A).
|
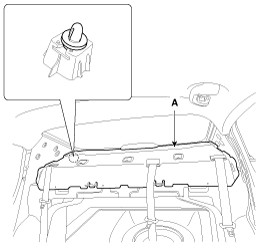
| 11. |
After loosening the retractor (B) mounting bolts, then remove
the rear seat belt (A).
[LH, RH]
[Center]
|
| 12. |
Installation is the reverse of removal.
|
Center Rear Seat Belt
| [5 Door] |
| 1. |
Remove the following items first :
|
| 2. |
After loosening the mounting nut, then remove the center rear
seat belt retractor (A).
|
| 3. |
Installation is the reverse of removal.
|
Rear Seat Belt Buckle Replacement
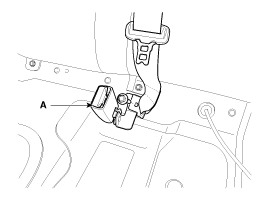
| 1. |
Remove the following items first :
|
| 2. |
Disconnect the rear seat buckle connector (B).
|
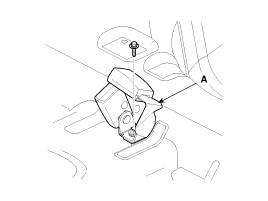
| 3. |
After loosening the mounting bolt, then remove the rear seat belt
buckle (A).
[LH]
[A Type]
[B Tyep]
[C Tyep]
[RH]
[A Type]
[B Tyep]
[C Tyep]
|
| 4. |
Installation is the reverse of removal.
|
 Front Seat Belt Replacement
Front Seat Belt Replacement
•
When installing the belt, make sure not to damaged the
...

See also:
Component Location
1. Headlamp leveling device
2. Headlamp leveling actuator
...
Line Pressure Control Solenoid Valve Specifications
Direct control VFS[LINE Pressure]
▷ Control type : Normal low type
Control Pressure kpa (kgf/cm², psi)
500.14 ~ 9.81 (5.1 ~ 0.1,72.54 ~ 1.42)
Current ...
Hazard Lamp Switch Inspection
1.
Operate the switch and check for continuity between terminals.
...
Copyright © www.kirmanual.com 2014-2024