 Kia Rio: Rear combination lamp Removal
| Rear combination lamp (Inside) |
[4 Door]
| 1. |
Disconnect the negative (-) battery terminal.
|
| 2. |
Remove the trunk trim.
(Refer to the BD group - "Trunk")
|
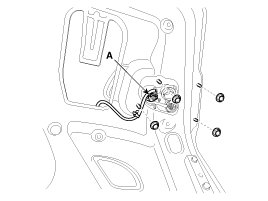
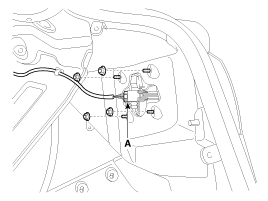
| 3. |
Remove rear combination lamp after removing the mounting nuts
(4EA) and disconnecting the connector (A).
|
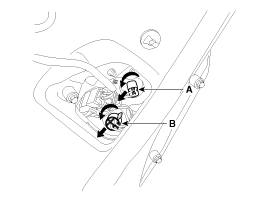
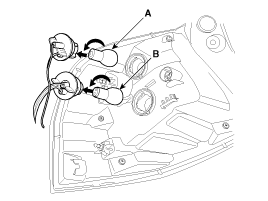
| 4. |
Remove the tail lamp bulb (A) and backup lamp bulb (B) after turning
in the counterclockwise direction.
|
| 5. |
If necessay to remove the bulb, remove the bulb after removing
the trunk trim
|
[5 Door]
| 1. |
Disconnect the negative (-) battery terminal.
|
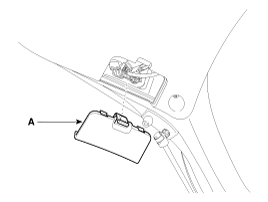
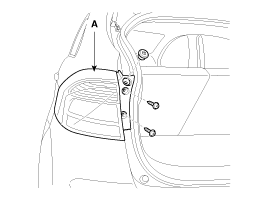
| 2. |
Remove the lamp cover (A).
|
| 3. |
Remove rear combination lamp after removing the mounting nuts
(3EA) and disconnecting the connector (A).
|
| 4. |
Remove the tail lamp bulb (A) and backup lamp bulb (B) after turning
in the counterclockwise direction.
|
| 5. |
If necessay to remove the bulb, remove the bulb after removing
the lamp cover.
|
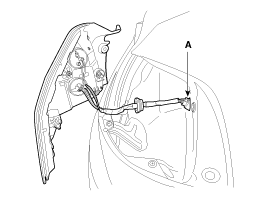
| Rear combination lamp (Outside) |
[4 Door]
| 1. |
Disconnect the negative (-) battery terminal.
|
| 2. |
Remove rear combination lamp after removing the mounting nuts
(4EA) and disconnecting the connector (A).
|
| 3. |
Remove the turn signal lamp bulb (A) and tail/ stop lamp bulb
(B) after turning in the counterclockwise direction.
|
| 4. |
If necessary to remove the bulb, remove the bulb after pulling
the trim cover aside.
|
[5 Door]
| 1. |
Disconnect the negative (-) battery terminal.
|
| 2. |
Remove the rear combination lamp (A) after removing the mounting
screws.
|
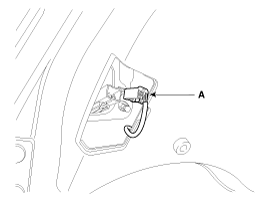
| 3. |
Disconnect the rear combination lamp connector (A).
|
| 4. |
Remove the turn signal lamp bulb (A) and tail/ stop lamp bulb
(B) after turning in the counterclockwise direction.
|
| 5. |
If necessary to remove the bulb, remove the bulb after pulling
the trim cover aside.
|
 High Mounted stop lamp Installation
[4 Door]
1.
Install the high mounted stop lamp assembly.
2.
Install the package tray trim.
3.
Connect the n ...
 Rear combination lamp Installation
Rear combination lamp (Inside)
[4 Door]
1.
Install the rear combination lamp assembly.
2.
Connect the rear combination connecto ...
See also:
Components
1. Hands free call switch
2. Mic
3. Front left speaker
4. Front right speaker
5. Audio head unit (hands free control)
※ There is no hands free jack. Thi ...
Troubleshooting Guide
Before Thinking The Product Has Malfunctioned
1.
Errors which occur during the operation or installation of the
device may be mistaken as a malfunction of the actual de ...
Photo Sensor (FATC only) Replacement
1.
Disconnect the negative (-) battery terminal.
2.
With a flat-head screwdriver, remove the photo sensor (A) from
the center of defrost no ...
Copyright © www.kirmanual.com 2014-2024