
 Kia Rio: AGM Battery: Removal and Installation
| 1. |
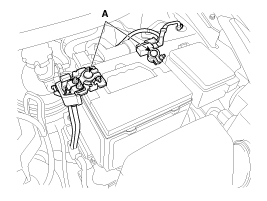
Remove the battery.
|
| 2. |
Remove the air duct and air cleaner assembly.
(Refer to EM group).
|
| 3. |
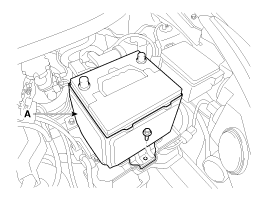
Remove the battery insulation pad (A).
|
| 4. |
Remove the battery (B) after removing the mounting bracket.
|
| 5. |
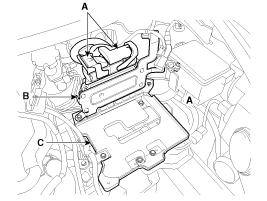
Remove the ECM (B) and the battery tray (C) after disconnecting
the ECM connector (A).
|
| 6. |
Installation is the reverse order of removal.
|


 AGM Battery: Adjustment
Battery charging
In general, vehicle battery charging system has three forms.
1.
Constant current charge: The battery voltage gradually rises by
chargi ...
 AGM Battery: Inspection
Battery Diagnostic Flow
Vehicle parasitic current inspection
1.
Turn all the electric devices OFF, and then turn the ignition
switch OFF.
...
See also:
Components Location
1. Torsion beam axle
2. Shock absorber
3. Coil spring assembly
4. Rear disc
...
Compressor Oil Specification
1.
The HFC-134a system requires synthetic compressor oil (PAG) whereas
the R-12 system requires mineral compressor oil. The two oils must never
be mixed.
...
Front Strut Assembly Components
•
Tighten with specifed torque at curb position of vehicle
â ...
Categories
- Kia Rio Manuals Home
- Kia Rio YB 2017-2025 Owners Manual
- Kia Rio YB 2017-2025 Service Manual
- Kia Rio UB 2012-2017 Owners Manual
- Kia Rio UB 2012-2017 Service Manual
- Downloads

Copyright © www.kirmanual.com 2014-2025