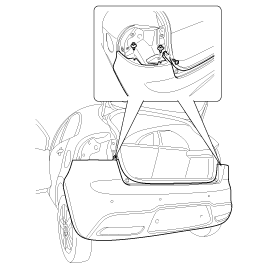
 Kia Rio: Rear Bumper Replacement
| [5 Door] |
|

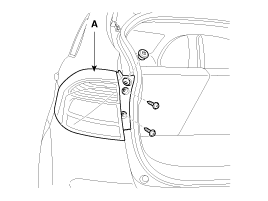
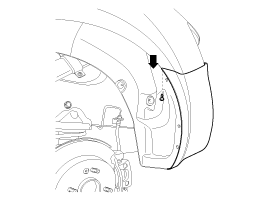
| 1. |
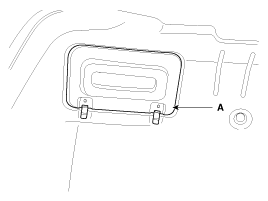
After loosening the mounting screws, then remove the rear combination
lamp (A).
|
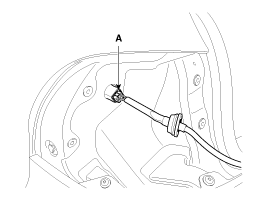
| 2. |
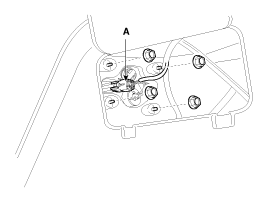
Disconnect the rear combination lamp connector (A).
|
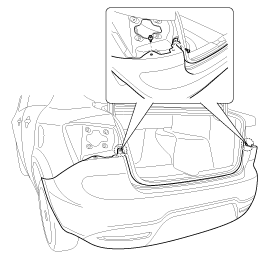
| 3. |
After loosening the rear bumper sideŌĆÖs mounting screws, then disconnect
the sideŌĆÖs.
|

| 4. |
Remove the rear bumper after pull out the rear bumper.
|
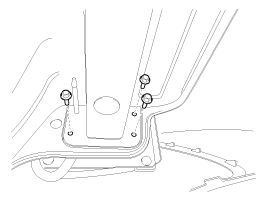
| 5. |
Loosen the rear bumper lower mounting bolts.
|
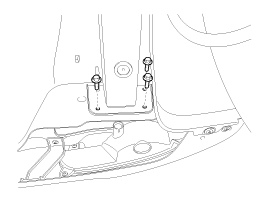
| 6. |
Loosen the rear bumper lower mounting clips.
|
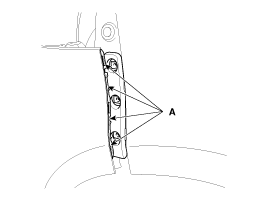
| 7. |
Loosen the rear bumper side mounting screw and clips.
|
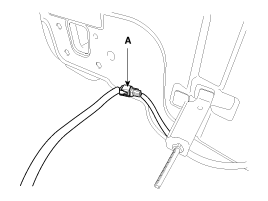
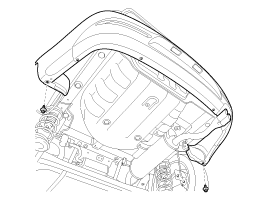
| 8. |
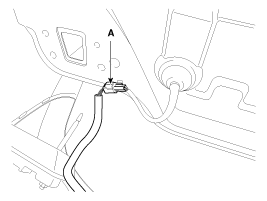
Push the lock pin, disconnect the rear bumper main connector (A).
|
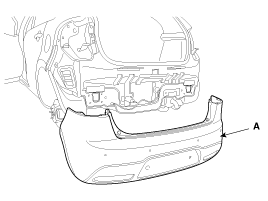
| 9. |
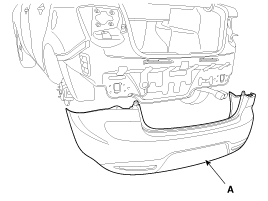
Remove the rear bumper cover (A).
|
| 10. |
Installation is the reverse of removal.
|

| [4 Door] |
|
| 1. |
Remove the rear combination lamp service hole (A).
|
| 2. |
Disconnect the connector (A) and then loosening the rear combination
lamp mounting nuts.
|
| 3. |
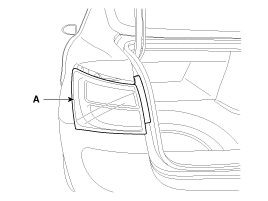
Remove the rear combination lamp (A).
|
| 4. |
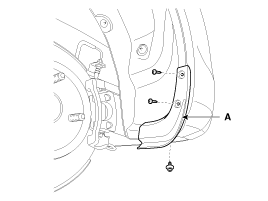
After loosening the mounting clip and screws, then remove the
rear mud guard (A).
|
| 5. |
After loosening the rear bumper sideŌĆÖs mounting screw, then disconnect
the sideŌĆÖs.
|
| 6. |
Loosen the rear bumper lower mounting clips.
|
| 7. |
Loosen the rear bumper lower mounting bolts.
|
| 8. |
Loosen the rear bumper side mounting screw and clips.
|
| 9. |
Push the lock pin, disconnect the rear bumper main connector (A).
|
| 10. |
Remove the rear bumper cover (A).
|
| 11. |
Installation is the reverse of removal.
|
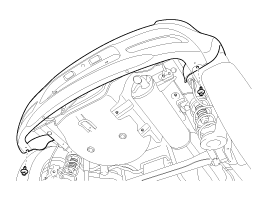
 Rear Bumper Components
[5 Door]
1. Rear bumper cover
2. Rear bumper side bracket [RH]
3. Rear bumper side bracket [LH]
4. Rear bumper side under cover
[4 Door]
...

See also:
Inspection
1.
Turn the ignition switch OFF.
2.
Disconnect the VIS valve connector.
3.
Measure resistance between VIS valve ...
Valve Clearance Inspection And Adjustment
Inspect and adjust the valve clearance when the engine is cold
(Engine coolant temperature : 20┬░C) and cylinder head is ...
Blower Resistor (MANUAL) Inspection
1.
Measure the resistance between the terminals.
2.
The measured resistance is not within specification, the blower
resistor must be replac ...
Categories
- Kia Rio Manuals Home
- Kia Rio YB 2017-2025 Owners Manual
- Kia Rio YB 2017-2025 Service Manual
- Kia Rio UB 2012-2017 Owners Manual
- Kia Rio UB 2012-2017 Service Manual
- Downloads

Copyright ® www.kirmanual.com 2014-2025