 Kia Rio: Exhaust Manifold: Removal and Installation
| 1. |
Remove the engine cover.
|
| 2. |
Disconnect the battery negative terminal.
|
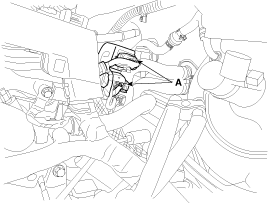
| 3. |
Disconnect the front and rear oxygen sensor connectors (A).
|
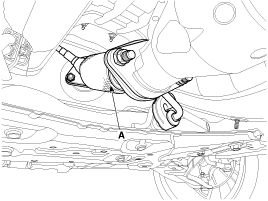
| 4. |
Remove the front muffler (A).
|
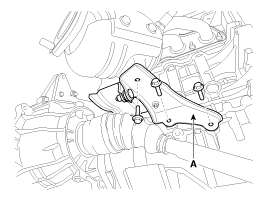
| 5. |
Remove the exhaust manifold stay (A).
|
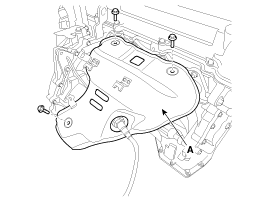
| 6. |
Remove the heat protector (A).
|
| 7. |
Remove the exhaust manifold (A).
|
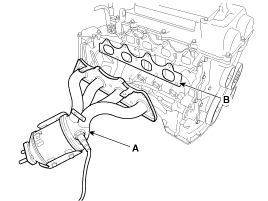

| 8. |
Installation is reverse order of removal.
|
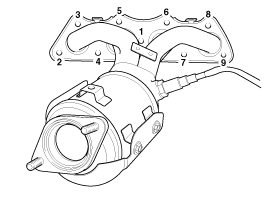
 Exhaust Manifold: Components
1. Heat protector
2. Exhaust manifold
3. Exhaust manifold gasket
4. Exhaust manifold stay
...
 Muffler: Components
1. Front muffler
2. Catalytic converter & Center muffler assembly
3. Main muffler
4. Gasket
5. Hanger
...
See also:
Antenna Installation
1.
Install the roof antenna, then connect the cable and the connector.
2.
Install the rear roof trim.
...
Installation
1.
Install the back view camera.
2.
Install the tailgate trim.
...
Control System Composition
Fault Diagnosis
Features a fail-safe mechanism that prevents dangerous situations from
developing in the event of a transaxle failure. The limp home mode engages if
the transaxle malf ...
Categories
- Kia Rio Manuals Home
- Kia Rio YB 2017-2026 Owners Manual
- Kia Rio YB 2017-2026 Service Manual
- Kia Rio UB 2012-2017 Owners Manual
- Kia Rio UB 2012-2017 Service Manual
- Downloads

Copyright ® www.kirmanual.com 2014-2026