 Kia Rio: Rear Seat Replacement
Rear Seat Assembly Replacement
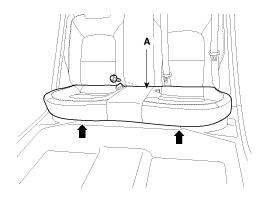
| 1. |
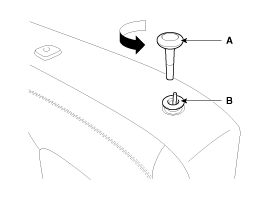
After loosening the mounting bolt, then remove the rear seat cushion
(A).
|
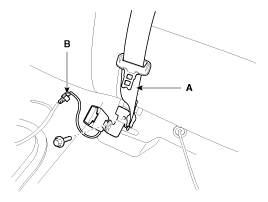
| 2. |
Disconnect the rear seat buckle connector (B).
|
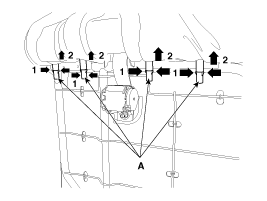
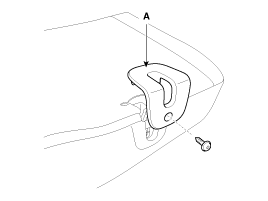
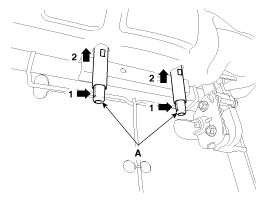
| 3. |
After loosening the mounting bolt, then remove the center rear
seat belt lower anchor (A).
|
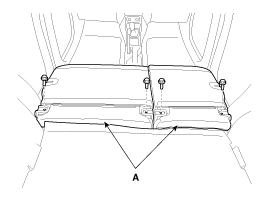
| 4. |
After loosening the mounting bolts, then remove the rear seat
back (A).
|
| 5. |
Installation is the reverse of removal.
|
Rear Seat Back Cover Replacement [LH]
| [5 Door] |
|

| 1. |
Remove the following items first :
|
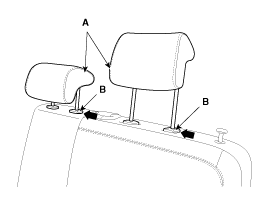
| 2. |
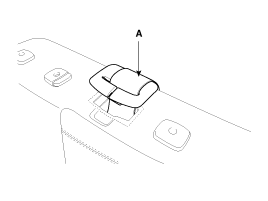
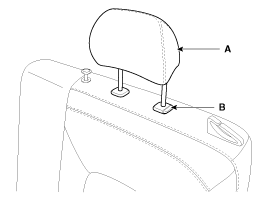
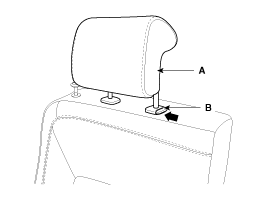
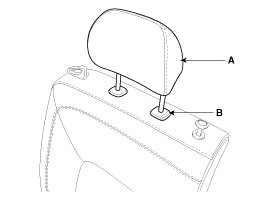
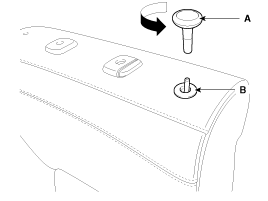
Push the lock pin (B), remove the headrest (A).
|
| 3. |
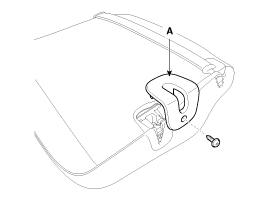
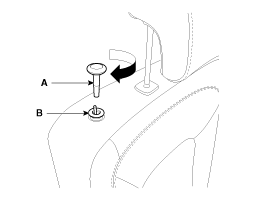
Remove the rear latch knob (A) after turning in the counter clock-wise
direction.
|
| 4. |
Remove the rear back knob bush (B).
|
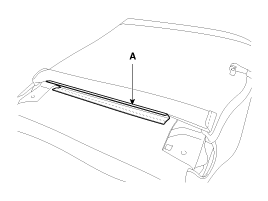
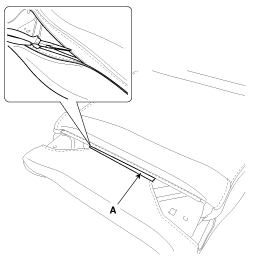
| 5. |
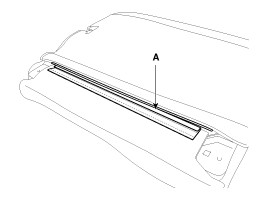
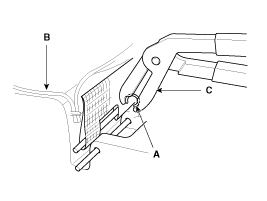
Using a screwdriver or remover, remove the webbing guide (A).
|
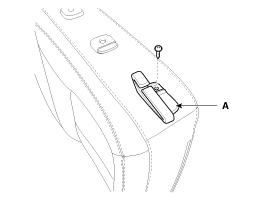
| 6. |
After loosening the mounting screw, then remove the rear seat
back latch cover (A).
|
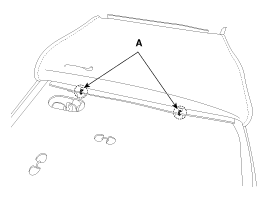
| 7. |
Remove the rear seat back lower mounting protector (A).
|
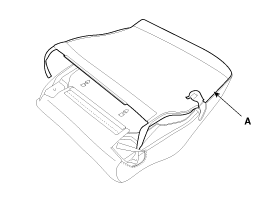
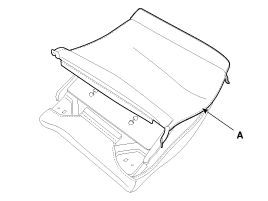
| 8. |
Zip off the rear seat back cover (A), and then full it up.
|

| 9. |
Pull out the headrest guides (A) while pinching the end of the
guides, and remove them.
|
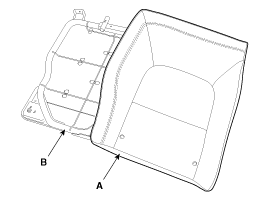
| 10. |
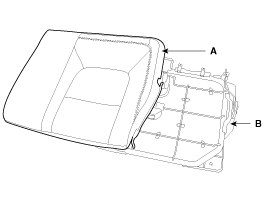
Remove the rear seat back cover (A) from the rear seat back frame
(B).
|
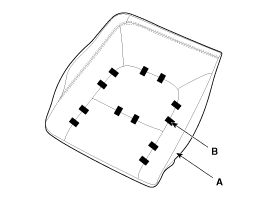
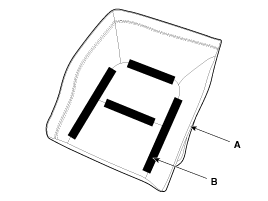
| 11. |
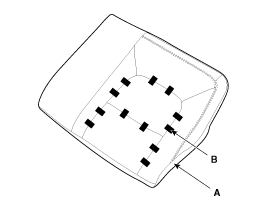
After removing the hog-ring clips (B) on the rear of seat back
and remove the rear seat back cover (A).
|
| 12. |
Installation is the reverse of removal.
|

| [4 Door] |
|
| 1. |
Remove the rear seat back assembly [LH].
|
| 2. |
Push the lock pin (B), remove the headrest (A).
|
| 3. |
After loosening the mounting screw, then remove the rear seat
back webbing guide (A).
|
| 4. |
Remove the rear latch knob (A) after turning in the counter clock-wise
direction.
|

| 5. |
Remove the rear seat back lower mounting protector (A).
|

| 6. |
Zip off the rear seat back cover (A), and then full it up.
|

| 7. |
Remove the hog-ring clips (A).
|

| 8. |
Pull out the headrest guides (A) while pinching the end of the
guides, and remove them.
|
| 9. |
Remove the rear seat back cover (A) from the rear seat back frame
(B).
|
| 10. |
After removing the hog-ring clips (B) on the rear of seat back
and remove the rear seat back cover (A).
|

| 11. |
Installation is the reverse of removal.
|
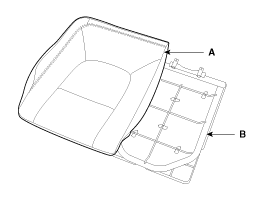
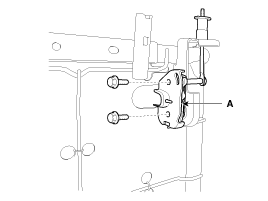
Rear Seat Latch Replacement [LH]
|
| 1. |
Remove the following items first :
|
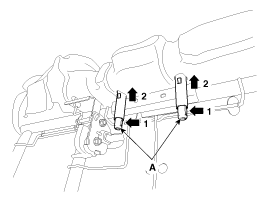
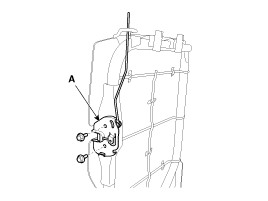
| 2. |
After loosening the mounting bolts, then remove the rear seat
latch assembly (A).
[5 Door]
[4 Door]
|
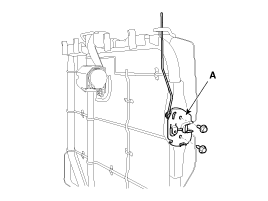
| 3. |
Installation is the reverse of removal.
|
Rear Seat Back Cover Replacement [RH]
| [5 Door] |
|
| 1. |
Remove the following items first :
|
| 2. |
Push the lock pin (B), remove the headrest (A).
|
| 3. |
Remove the rear latch knob (A) after turning in the counter clock-wise
direction.
|
| 4. |
Remove the rear back knob bush (B).
|
| 5. |
After loosening the mounting screw, then remove the rear seat
back latch cover (A).
|
| 6. |
Remove the rear seat back lower mounting protector (A).
|
| 7. |
Zip off the rear seat back cover (A), and then full it up.
|
| 8. |
Pull out the headrest guides (A) while pinching the end of the
guides, and remove them.
|
| 9. |
Remove the rear seat back cover (A) from the rear seat back frame
(B).
|
| 10. |
After removing the hog-ring clips (B) on the rear of seat back
and remove the rear seat back cover (A).
|
| 11. |
Installation is the reverse of removal.
|
| [4 Door] |
|
| 1. |
Remove the rear seat back assembly [RH].
|
| 2. |
Push the lock pin (B), remove the headrest (A).
|
| 3. |
After loosening the mounting screw, then remove the rear seat
back webbing guide (A).
|
| 4. |
Remove the rear latch knob (A) after turning in the counter clock-wise
direction.
|
| 5. |
Remove the rear seat back lower mounting protector (A).
|
| 6. |
Zip off the rear seat back cover (A), and then full it up.
|
| 7. |
Remove the hog-ring clips (A).
|
| 8. |
Pull out the headrest guides (A) while pinching the end of the
guides, and remove them.
|
| 9. |
Remove the rear seat back cover (A) from the rear seat back frame
(B).
|
| 10. |
After removing the hog-ring clips (B) on the rear of seat back
and remove the rear seat back cover (A).
|
| 11. |
Installation is the reverse of removal.
|
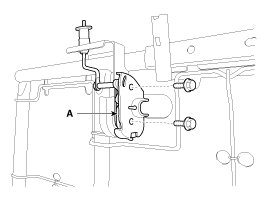
Rear Seat Latch Replacement [RH]
|
| 1. |
Remove the following items first :
|
| 2. |
After loosening the mounting bolts, then remove the rear seat
latch assembly (A).
[5 Door]
[4 Door]
|
| 3. |
Installation is the reverse of removal.
|
Rear Seat Cushion Cover Replacement
|
| 1. |
Remove the following items first :
|
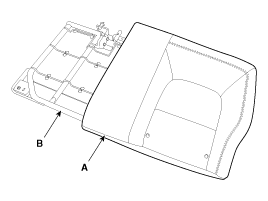
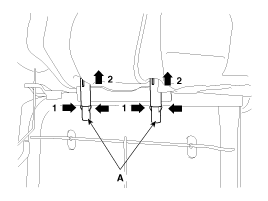
| 2. |
Remove the hog-ring clips (A).
|
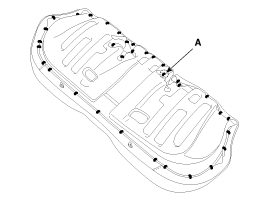
| 3. |
After removing the hog-ring clips (B) on the rear of seat cushion
and remove the rear seat cushion cover (A).
|
| 4. |
Installation is the reverse of removal.
|
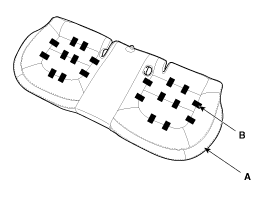
 Rear Seat Components
[5 Door]
1. Headrest
2 . Headrest guide
3 . Webbing guide
4 . Rear latch knob
5 . Rear back knob bush
6 . Rear seat back silencer cloth
7 . Rear seat back pad ...
 Seat Belt
...
See also:
Intake Actuator Description
The intake actuator is located at the blower unit. It regulates the intake
door by signal from control unit. Pressing the intake selection switch will
shift between recirculation and fresh ai ...
Measurement Point
Measurements should be taken at the center of the hole.
...
Installation
1.
Dowel pin of crankshaft setted about 3┬░ with vertical center line.
2.
Align the TDC marks (A) of the CVVT sprockets with the upper s ...
Categories
- Kia Rio Manuals Home
- Kia Rio YB 2017-2026 Owners Manual
- Kia Rio YB 2017-2026 Service Manual
- Kia Rio UB 2012-2017 Owners Manual
- Kia Rio UB 2012-2017 Service Manual
- Downloads

Copyright ® www.kirmanual.com 2014-2026