 Kia Rio: Sub Frame Replacement
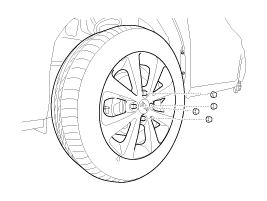
| 1. |
Remove the front wheel & tire.
|

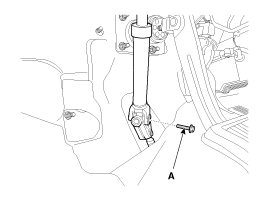
| 2. |
Disconnect the stabilizer link (B) with the front strut assembly
(A) after loosening the nut.
|

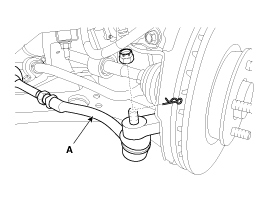
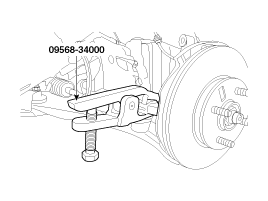
| 3. |
Loosen the nut and then remove the tie-rod end (A) with the front
axle (B) by using SST(09568-34000).
|
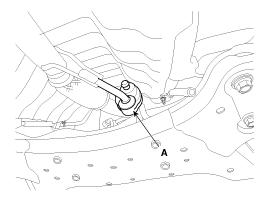
| 4. |
Loosen the nut and then remove the lower arm (A).
|
| 5. |
Loosen the bolt (A) and then disconnect the universal joint assembly
from the pinion of the steering gear box.
|
| 6. |
Remove the rubber hanger (A).
|
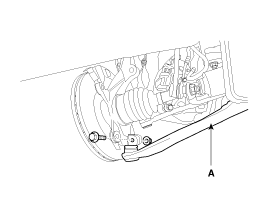
| 7. |
Loosening the roll rod (A) mounting bolts and nuts.
|
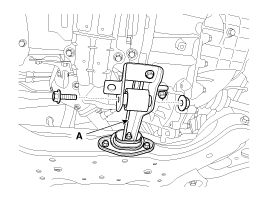
| 8. |
Loosen the bolts & nuts and then remove the front sub frame (A).
|
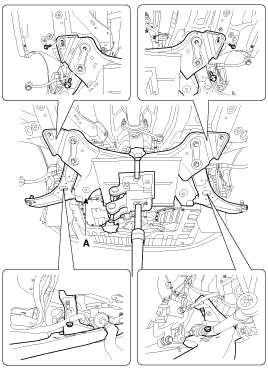
| 9. |
Installation is the reverse of removal.
|
 Front Stabilizer Bar Inspection
1.
Check the bushing for wear and deterioration.
2.
Check the front stabilizer bar for deformation.
3.
Check th ...

See also:
Components
...
Sunroof Components
1 . Glass panel assembly
2 . Glass panel
3 . Reinforcement glass
4 . Encapsulated glass panel
5 . Wind deflector net assembly
6 . Wind deflector beam
7 . Plate cover [RH] ...
Torque Converter Control Solenoid Valve (T/CON_VFS) Inspection
1.
Turn ignition switch OFF.
2.
Disconnect the solenoid valve connector.
3.
Measure resistance between sensor ...
Categories
- Kia Rio Manuals Home
- Kia Rio YB 2017-2025 Owners Manual
- Kia Rio YB 2017-2025 Service Manual
- Kia Rio UB 2012-2017 Owners Manual
- Kia Rio UB 2012-2017 Service Manual
- Downloads

Copyright ® www.kirmanual.com 2014-2025