 Kia Rio: Front Driveshaft Replacement
| 1. |
Loosen the wheel nuts slightly.
Raise the vehicle, and make sure it is securely supported.
|
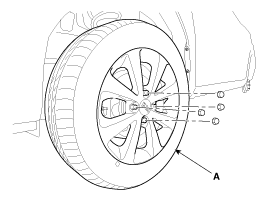
| 2. |
Remove the front wheel and tire (A) from front hub.
|

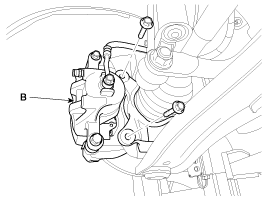
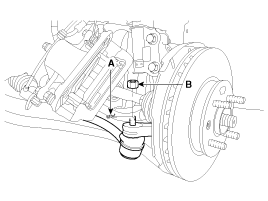
| 3. |
Remove the brake caliper mounting bolts, and then hold the brake
caliper assembly (B) with wire.
|
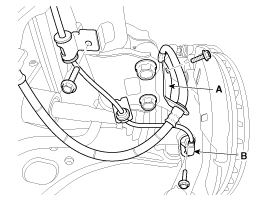
| 4. |
Remove the brake hose bracket (A) & wheel speed sensor (B).
|
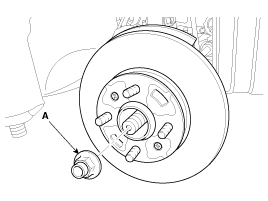
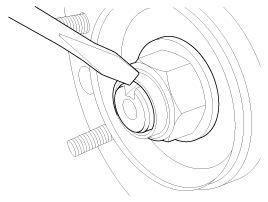
| 5. |
Remove driveshaft nut (A) from the front hub after applying the
brake.
|
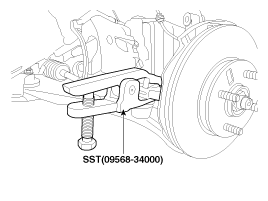
| 6. |
Remove the tie rod end ball joint from the knuckle by using the
SST(09568-34000).
|
| 7. |
Remove the lower arm (A) from the knuckle.
|
| 8. |
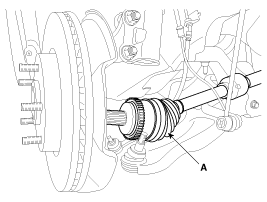
Disconnect the driveshaft (A) from the front hub assembly.
|
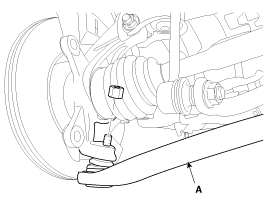
| 9. |
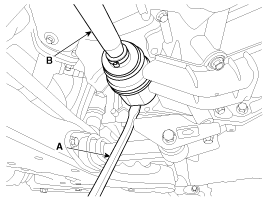
Insert a pry bar (A) between the transaxle case and joint case,
and separate the drive shaft (B) from the transaxle case.
|
| 10. |
Install in the reverse order of removal.
|
 Front Driveshaft Component
1. Driveshaft (LH)
2. Circlip
3. Circlip
4. Driveshaft (RH)
...
 Front Driveshaft Inspection
1.
Check the driveshaft boots for damage and deterioration.
2.
Check the driveshaft spline for wear or damage.
3.
...
See also:
Components
1. Transaxle mounting bracket
2. Roll rod bracket
3. Engine mounting bracket
4. Engine mounting support bracket
...
Inspection
ŌĆó
Frequent inhalation of brake pad dust, regardless of material
composition, could be ...
Operation
Passive Functions
The system allows the user to access the vehicle without having to perform
any actions (e.g. RKE button pressing) with the SMART KEY fob. It is sufficient
that a valid S ...
Categories
- Kia Rio Manuals Home
- Kia Rio YB 2017-2026 Owners Manual
- Kia Rio YB 2017-2026 Service Manual
- Kia Rio UB 2012-2017 Owners Manual
- Kia Rio UB 2012-2017 Service Manual
- Downloads

Copyright ® www.kirmanual.com 2014-2026