 Kia Rio: Rear Door Adjustment
Glass Adjustment
|

| 1. |
Remove the following items :
|
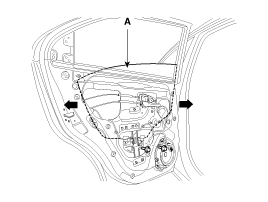
| 2. |
Carefully move the glass (A) until the glass mounting bolts are
visible, then loosen them.
[5 Door]
[4 Door]
|

| 3. |
Check that the glass moves smoothly.
|
Door Position Adjustment
|
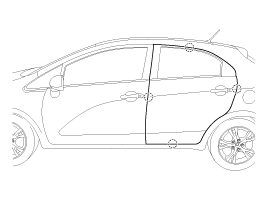
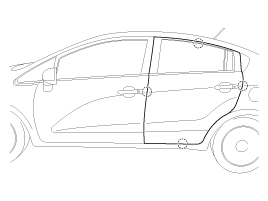
| 1. |
Check that the door and body edges are parallel.
[5 Door]
[4 Door]
|
| 2. |
Place the vehicle on a firm, level surface when adjusting the
doors.
|
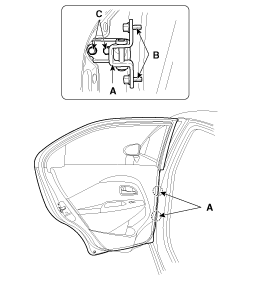
| 3. |
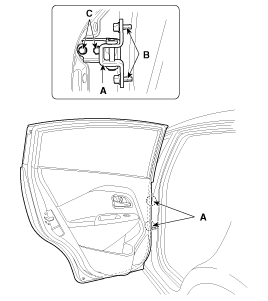
Adjust at the hinges (A) :
[5 Door]
[4 Door]
|
| 4. |
Grease the pivot portions of the hinges indicated.
|
| 5. |
Check for water leaks.
|
Door Striker Adjustment
Make sure the door latches securely without slamming it. If necessary
adjust the striker (A): The striker nuts are fixed. The striker can be adjusted
up or down, and in or out.
| 1. |
Loosen the screws (B) just enough for the striker to move.
|
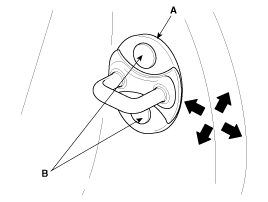
| 2. |
Tap on the striker with a plastic hammer to adjust the striker.
The striker will not move much, but will give some adjustment.
|
| 3. |
Hold the outer handle out, and push the door against the body
to be sure the striker allows a flush fit. If the door latches properly,
tighten the screws and recheck.
|
 Rear Door Replacement
Door Trim Replacement
[5 Door]
ŌĆó
Take care not to scratch the door trim and ...
 Body Side Moulding Replacement
Roof Garnish Replacement
ŌĆó
When prying with a flat-tip screwdriver, wrap it with
p ...
See also:
Windshield Glass Components
1. Windshield glass
2. Windshield glass moulding
...
Electric Oil Pump: Circuit Diagram
...
Temperature Control Actuator Inspection
1.
Turn the ignition switch OFF.
2.
Disconnect the temperature control actuator connector.
3.
Verify that the t ...
Categories
- Kia Rio Manuals Home
- Kia Rio YB 2017-2026 Owners Manual
- Kia Rio YB 2017-2026 Service Manual
- Kia Rio UB 2012-2017 Owners Manual
- Kia Rio UB 2012-2017 Service Manual
- Downloads

Copyright ® www.kirmanual.com 2014-2026