 Kia Rio: Rear Seat Replacement
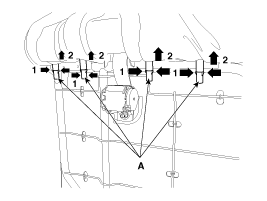
Rear Seat Assembly Replacement
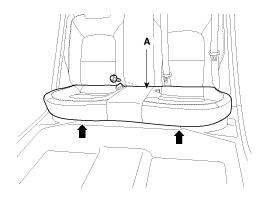
| 1. |
After loosening the mounting bolt, then remove the rear seat cushion
(A).
|
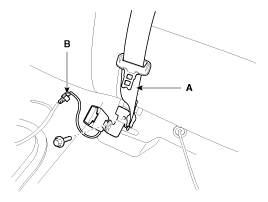
| 2. |
Disconnect the rear seat buckle connector (B).
|
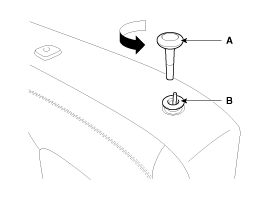
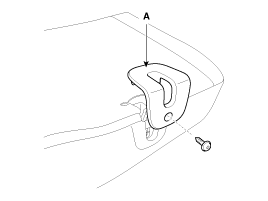
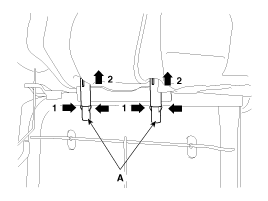
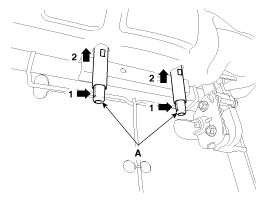
| 3. |
After loosening the mounting bolt, then remove the center rear
seat belt lower anchor (A).
|
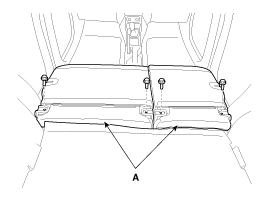
| 4. |
After loosening the mounting bolts, then remove the rear seat
back (A).
|
| 5. |
Installation is the reverse of removal.
|
Rear Seat Back Cover Replacement [LH]
| [5 Door] |
|

| 1. |
Remove the following items first :
|
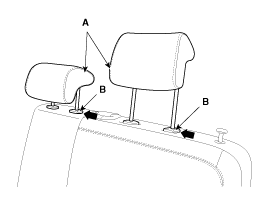
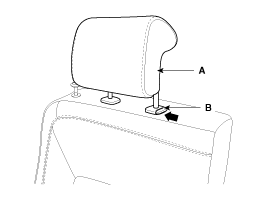
| 2. |
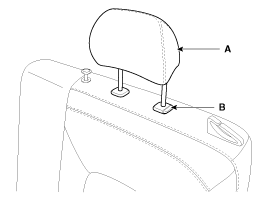
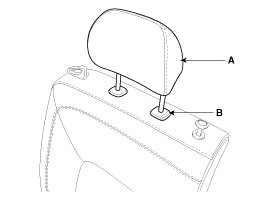
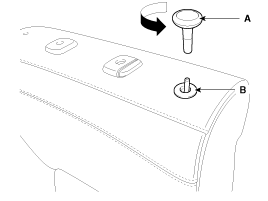
Push the lock pin (B), remove the headrest (A).
|
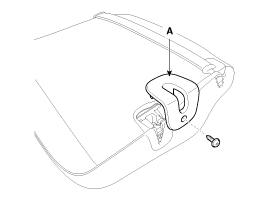
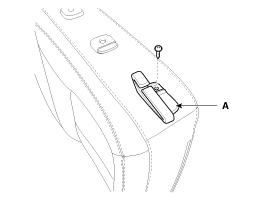
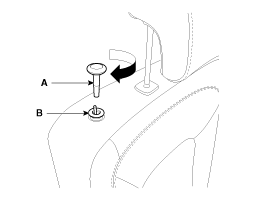
| 3. |
Remove the rear latch knob (A) after turning in the counter clock-wise
direction.
|
| 4. |
Remove the rear back knob bush (B).
|
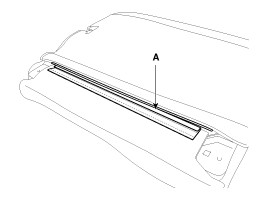
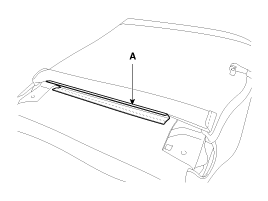
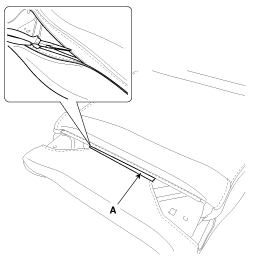
| 5. |
Using a screwdriver or remover, remove the webbing guide (A).
|
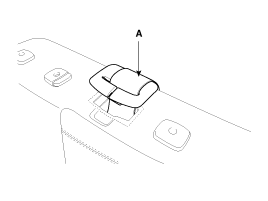
| 6. |
After loosening the mounting screw, then remove the rear seat
back latch cover (A).
|
| 7. |
Remove the rear seat back lower mounting protector (A).
|
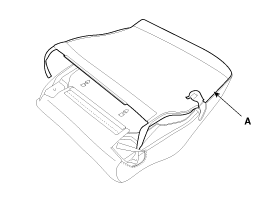
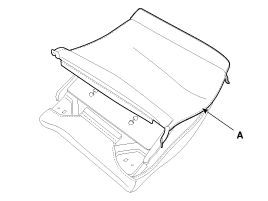
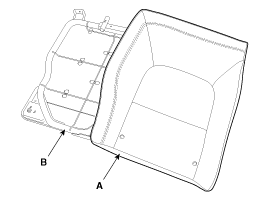
| 8. |
Zip off the rear seat back cover (A), and then full it up.
|

| 9. |
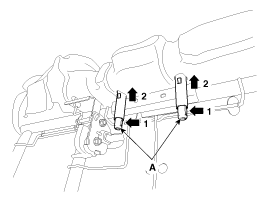
Pull out the headrest guides (A) while pinching the end of the
guides, and remove them.
|
| 10. |
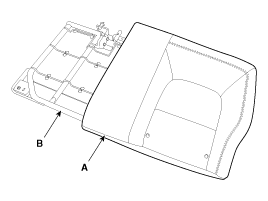
Remove the rear seat back cover (A) from the rear seat back frame
(B).
|
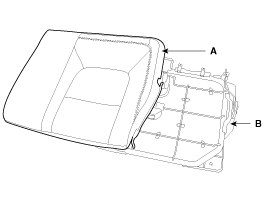
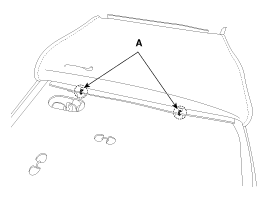
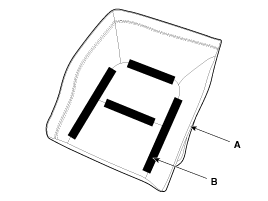
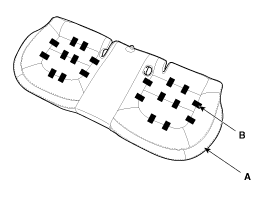
| 11. |
After removing the hog-ring clips (B) on the rear of seat back
and remove the rear seat back cover (A).
|
| 12. |
Installation is the reverse of removal.
|

| [4 Door] |
|
| 1. |
Remove the rear seat back assembly [LH].
|
| 2. |
Push the lock pin (B), remove the headrest (A).
|
| 3. |
After loosening the mounting screw, then remove the rear seat
back webbing guide (A).
|
| 4. |
Remove the rear latch knob (A) after turning in the counter clock-wise
direction.
|

| 5. |
Remove the rear seat back lower mounting protector (A).
|

| 6. |
Zip off the rear seat back cover (A), and then full it up.
|

| 7. |
Remove the hog-ring clips (A).
|

| 8. |
Pull out the headrest guides (A) while pinching the end of the
guides, and remove them.
|
| 9. |
Remove the rear seat back cover (A) from the rear seat back frame
(B).
|
| 10. |
After removing the hog-ring clips (B) on the rear of seat back
and remove the rear seat back cover (A).
|

| 11. |
Installation is the reverse of removal.
|
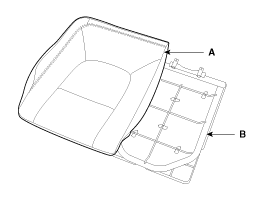
Rear Seat Latch Replacement [LH]
|
| 1. |
Remove the following items first :
|
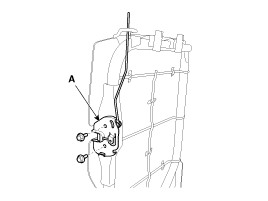
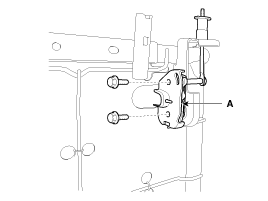
| 2. |
After loosening the mounting bolts, then remove the rear seat
latch assembly (A).
[5 Door]
[4 Door]
|
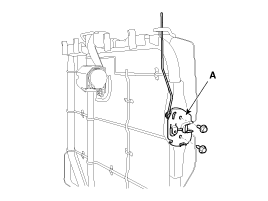
| 3. |
Installation is the reverse of removal.
|
Rear Seat Back Cover Replacement [RH]
| [5 Door] |
|
| 1. |
Remove the following items first :
|
| 2. |
Push the lock pin (B), remove the headrest (A).
|
| 3. |
Remove the rear latch knob (A) after turning in the counter clock-wise
direction.
|
| 4. |
Remove the rear back knob bush (B).
|
| 5. |
After loosening the mounting screw, then remove the rear seat
back latch cover (A).
|
| 6. |
Remove the rear seat back lower mounting protector (A).
|
| 7. |
Zip off the rear seat back cover (A), and then full it up.
|
| 8. |
Pull out the headrest guides (A) while pinching the end of the
guides, and remove them.
|
| 9. |
Remove the rear seat back cover (A) from the rear seat back frame
(B).
|
| 10. |
After removing the hog-ring clips (B) on the rear of seat back
and remove the rear seat back cover (A).
|
| 11. |
Installation is the reverse of removal.
|
| [4 Door] |
|
| 1. |
Remove the rear seat back assembly [RH].
|
| 2. |
Push the lock pin (B), remove the headrest (A).
|
| 3. |
After loosening the mounting screw, then remove the rear seat
back webbing guide (A).
|
| 4. |
Remove the rear latch knob (A) after turning in the counter clock-wise
direction.
|
| 5. |
Remove the rear seat back lower mounting protector (A).
|
| 6. |
Zip off the rear seat back cover (A), and then full it up.
|
| 7. |
Remove the hog-ring clips (A).
|
| 8. |
Pull out the headrest guides (A) while pinching the end of the
guides, and remove them.
|
| 9. |
Remove the rear seat back cover (A) from the rear seat back frame
(B).
|
| 10. |
After removing the hog-ring clips (B) on the rear of seat back
and remove the rear seat back cover (A).
|
| 11. |
Installation is the reverse of removal.
|
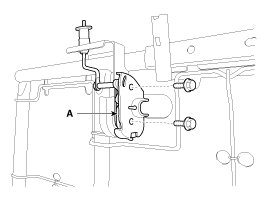
Rear Seat Latch Replacement [RH]
|
| 1. |
Remove the following items first :
|
| 2. |
After loosening the mounting bolts, then remove the rear seat
latch assembly (A).
[5 Door]
[4 Door]
|
| 3. |
Installation is the reverse of removal.
|
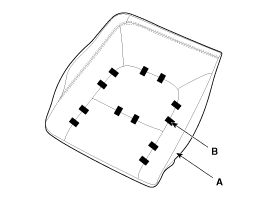
Rear Seat Cushion Cover Replacement
|
| 1. |
Remove the following items first :
|
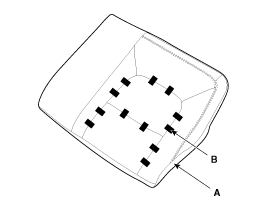
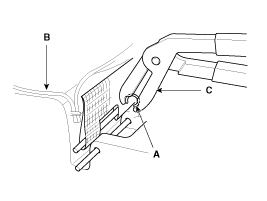
| 2. |
Remove the hog-ring clips (A).
|
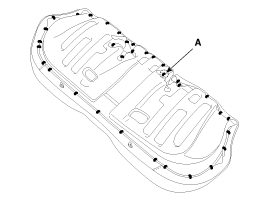
| 3. |
After removing the hog-ring clips (B) on the rear of seat cushion
and remove the rear seat cushion cover (A).
|
| 4. |
Installation is the reverse of removal.
|
 Rear Seat Components
[5 Door]
1. Headrest
2 . Headrest guide
3 . Webbing guide
4 . Rear latch knob
5 . Rear back knob bush
6 . Rear seat back silencer cloth
7 . Rear seat back pad ...
 Seat Belt
...
See also:
Fluid Components Location
1. Injection hole(eyebolt)
2. Oil level plug
3. Oil drain plug
...
ISG OFF Switch: Inspection
1.
Remove the crash pad side switch assembly (A) from the switch
panel on the crach pad of the driver's side.
2.
Remove the ISG ...
Cruise Control Switch: Inspection
Measuring Resistance
1.
Disconnect the cruise control switch connector from the control
switch.
2.
Measure resistance between t ...
Categories
- Kia Rio Manuals Home
- Kia Rio YB 2017-2026 Owners Manual
- Kia Rio YB 2017-2026 Service Manual
- Kia Rio UB 2012-2017 Owners Manual
- Kia Rio UB 2012-2017 Service Manual
- Downloads

Copyright ® www.kirmanual.com 2014-2026