
 Kia Rio: Valve Body Removal
| 1. |
Remove the battery and the battery tray.
(Refer to "Charging system" in EE group.)
|
| 2. |
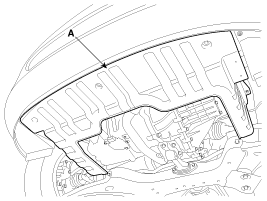
Remove the under cover (A).
|
| 3. |
Replace new gasket and the plug after draining the automatic transaxle
fluid by removing the drain plug. (Refer to "Hydraulic system (Fluid)"
in this group)
|
| 4. |
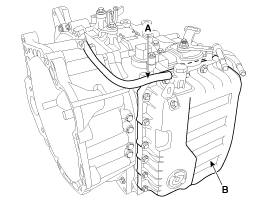
Remove the valve body cover (B).
|
| 5. |
Remove thd air breather hose (A).
|
| 6. |
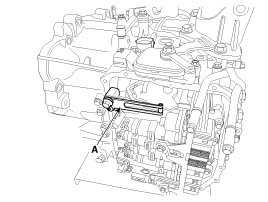
Remove the plate and the detent spring (A) after removing the
bolt.
|
| 7. |
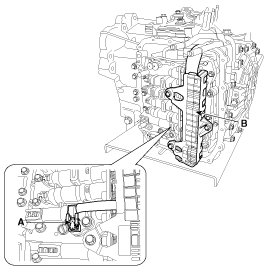
Remove the bolt (3ea) after disconnecting the solenoid valve (B)
connector and the oil temperature sensor connector (A).
|
| 8. |
Remove the valve body assembly (A).
|
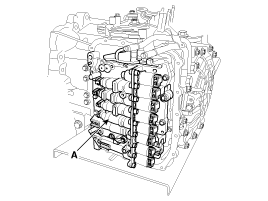
 Valve Body Components Location
1. PCV adjust screw
2. Solenoid valve
3. Oil temperature sensor
4. Accumulator
5. Low & reverse brake(LR/B) pressure flow hole
6. Under drive brake (UD/B) pressur ...
 Valve Body Installation
1.
Installation is the reverse of removal.
After replacement or reinstallation procedure of ...
See also:
Seat Belt Switch Inspection
1.
Remove the connector from the switch.
2.
Check for continuity between terminals.
Seat belt condition
Continu ...
Special driving conditions
Hazardous driving conditions
When hazardous driving conditions are encountered such as water, snow, ice, mud,
sand, or similar hazards, follow these suggestions:
Drive cautiously and allow extr ...
Seat Heater Inspection
Driver seat and Passenger seat
1.
Check for continuity and measure the resistance between terminals.
[Cushion]
Pin No.
...
Categories
- Kia Rio Manuals Home
- Kia Rio YB 2017-2026 Owners Manual
- Kia Rio YB 2017-2026 Service Manual
- Kia Rio UB 2012-2017 Owners Manual
- Kia Rio UB 2012-2017 Service Manual
- Downloads

Copyright © www.kirmanual.com 2014-2026