 Kia Rio: Front Door Replacement
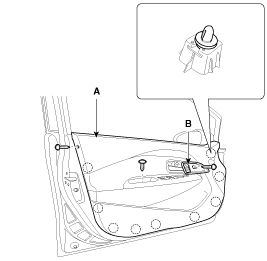
Front Door Trim Replacement
|

| 1. |
After loosening the mounting screw, then remove the front door
inside handle housing (B).
|
| 2. |
After loosening the mounting screws, then remove the front door
trim (A).
|
| 3. |
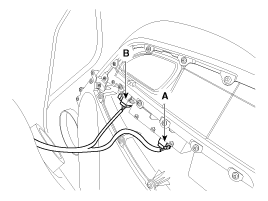
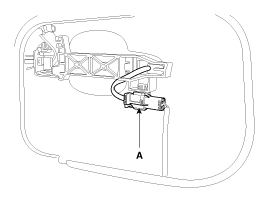
Disconnect the power window connector (A) and outside mirror folding
switch connector (B).
|
| 4. |
Installation is the reverse of removal.
|

Inside Handle Replacement
| 1. |
Remove the following items :
|
| 2. |
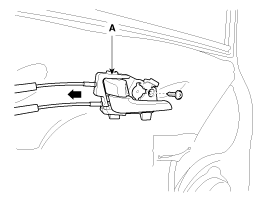
After loosening the mounting screw, then remove the front door
inside handle (A).
|

| 3. |
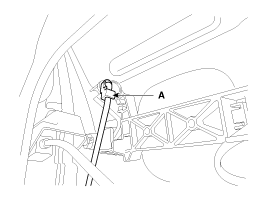
Disconnect the front door inside handle cable (A).
|

| 4. |
Installation is the reverse of removal.
|
Glass Replacement
| 1. |
Remove the following items :
|
| 2. |
After loosening the mounting screw, then remove the front door
inside handle (A).
|
| 3. |
Disconnect the front door inside handle cable (A).
|
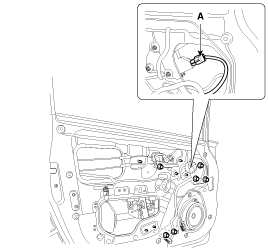
| 4. |
Disconnect the front door speaker connector (A).
|
| 5. |
After loosening the mounting screws, then remove the front door
trim seal mounting bracket (B).
|
| 6. |
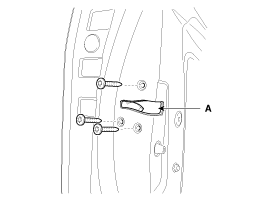
Remove the front door trim seal (A).
|
| 7. |
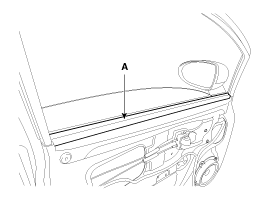
Remove the front door belt inside weatherstrip (A).
|
| 8. |
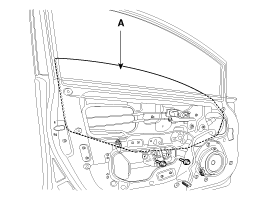
Carefully move the glass (A) until you can see the bolts, then
loosen them. Separate the glass from the glass run and carefully pull
the glass out through the window slot.
|
| 9. |
Installation is the reverse of removal.
|
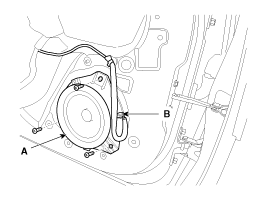
Speaker Replacement
| 1. |
Remove the following items :
|
| 2. |
Disconnect the speaker connector (B).
|
| 3. |
After loosening the mounting screws, then remove the front door
speaker (A).
|
| 4. |
Installation is the reverse of removal.
|
Door Power Window Regulator Assembly Replacement
| 1. |
Remove the following items :
|
| 2. |
Loosen the front door power window regulator mounting nuts.
|
| 3. |
Disconnect the front door power window motor connector (A).
|
| 4. |
Remove the front door power window regulator assembly (A).
|

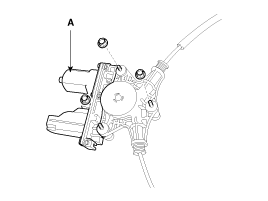
| 5. |
After loosening the mounting nuts, then remove the front door
power window motor (A).
|
| 6. |
Installation is the reverse of removal.
|
Outside Handle Replacement
| 1. |
Remove the following items :
|
| 2. |
After loosening the mounting screw, then remove the front door
inside handle (A).
|
| 3. |
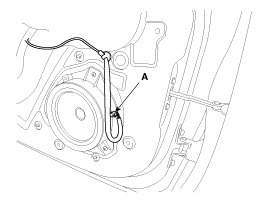
Disconnect the front door inside handle cable (A).
|
| 4. |
Disconnect the front door speaker connector (A).
|
| 5. |
After loosening the mounting screws, then remove the front door
trim seal mounting bracket (B).
|
| 6. |
Remove the front door trim seal (A).
|

| 7. |
Remove the hole plug (B).
|
| 8. |
After loosening the mounting bolt, then remove the outside handle
cover (A).
|
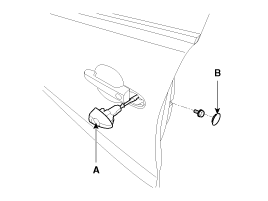
| 9. |
Remove the outside handle (A) by sliding it rearward.
|

| 10. |
Disconnect the outside handle connector (A).
|
| 11. |
Installation is the reverse of removal.
|
Door Latch Replacement
| 1. |
Remove the following items :
|
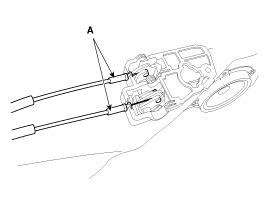
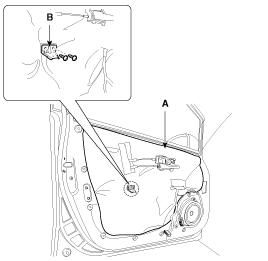
| 2. |
Disconnect the outside handle rod (A).
|
| 3. |
Loosen the front door latch (A) mounting screws.
|
| 4. |
Remove the front door latch assembly (A).
|

| 5. |
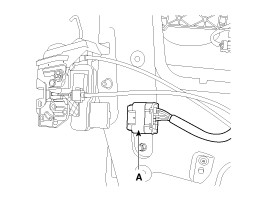
Disconnect the front door latch connector (A).
|
| 6. |
Installation is the reverse of removal.
|
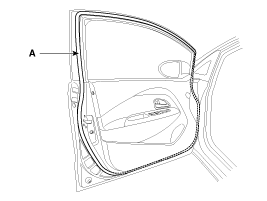
Door Side Weatherstrip Replacement
| 1. |
Detach the clips, then remove the front door side weatherstrip(A).
|
| 2. |
Installation is the reverse of removal.
|
 Front Door Components
1 . Front door trim
2 . Front door trim seal
3 . Front door panel
4. Front door belt inside weatherstrip
5 . Front door belt outside weatherstrip
6. Front door window glass ...
 Front Door Adjustment
Glass Adjustment
ŌĆó
Check the glass run channel for damage or deterioration,
and re ...
See also:
Clutch & Brake
The 6-spd automatic transaxle consists of an overdrive clutch (OD/C),
a one-way clutch (OWC), a lower and reverse brake (LR/B), an underdrive brake
(UD/B), a 26 brake (26/B), and a 35R clutch ...
Description
Exhaust emissions (CO, HC, NOx) are controlled by a combination of engine
modifications and the addition of special control components.
Modifications to the combustion chamber, intake manifo ...
Cruise Control Switch: Removal
1.
Disconnect the battery (-) terminal.
2.
Remove the air-bag module from the steering wheel. (Refer to Restraint
- "Driver Airbag (DA ...
Categories
- Kia Rio Manuals Home
- Kia Rio YB 2017-2026 Owners Manual
- Kia Rio YB 2017-2026 Service Manual
- Kia Rio UB 2012-2017 Owners Manual
- Kia Rio UB 2012-2017 Service Manual
- Downloads

Copyright ® www.kirmanual.com 2014-2026