 Kia Rio: Hood Replacement
Hood Assembly Replacement
|

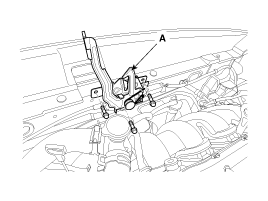
| 1. |
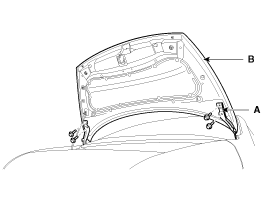
After loosening the hood hinge (A) mounting bolts, and then remove
the hood (B).
|
| 2. |
Installation is the reverse of removal.
|

Hood Insulator Pad Replacement
| 1. |
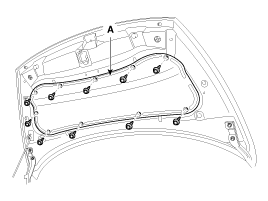
Using a clip remover, detach the clips, and remove the hood insulator
pad (A).
|
| 2. |
Installation is the reverse of removal.
|
Hood Weatherstrip Replacement
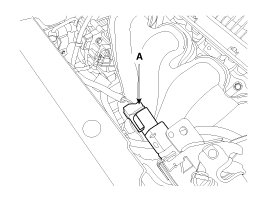
| 1. |
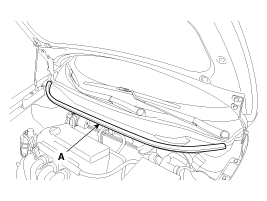
Remove the hood weatherstrip (A).
|
| 2. |
Installation is the reverse of removal.
|
Hood Release Handle Replacement
| 1. |
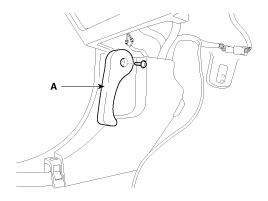
After loosening the mounting screw, then remove the hood release
handle (A).
|
| 2. |
Installation is the reverse of removal.
|
Hood Latch Replacement
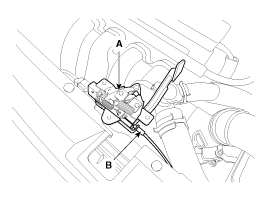
| 1. |
Remove the hood latch (A) mounting bolts.
|
| 2. |
Disconnect the hood latch connector (A).
|
| 3. |
Disconnect the hood latch cable (B) and remove the hood latch
(A).
|
| 4. |
Installation is the reverse of removal.
|
 Fender Replacement
ŌĆó
When removing and installing the fender, an assistant
is necessary.
...
 Hood Adjustment
Hood Adjustment
1.
After loosening the hinge (A) mounting bolt, adjust the hood (B)
by moving it up or down, or right or left.
2.
Adjus ...
See also:
4Door Front Body C
Engine mounting hole (Ø11)
Transaxle mounting hole (Ø12)
Engine mounting hole (Ø12)
...
Alternator: Description
The charging system included a battery, an alternator with a built-in
regulator, and the charging indicator light and wire.
The Alternator has eight built-in diodes, each rectifying AC curre ...
Seat Belt Buckle Switch (BS) Description
The SRSCM shall monitor the status of the driver and front passenger seat
belt buckle. The SRSCM provides one pin each for the driver and front passenger
seat belt buckle status input. The se ...
Categories
- Kia Rio Manuals Home
- Kia Rio YB 2017-2026 Owners Manual
- Kia Rio YB 2017-2026 Service Manual
- Kia Rio UB 2012-2017 Owners Manual
- Kia Rio UB 2012-2017 Service Manual
- Downloads

Copyright ® www.kirmanual.com 2014-2026