 Kia Rio: Intake Manifold: Removal and Installation
| 1. |
Remove the engine cover.
|
| 2. |
Disconnect the battery negative terminal.
|
| 3. |
Remove the air duct and the air cleaner assembly.
(Refer to Engine and transaxle assembly)
|
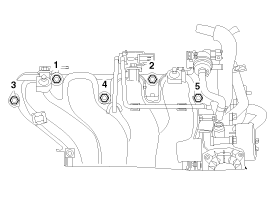
| 4. |
Disconnect the injector extension connector (A), the VIS (Variable
intake system) connector (B) and the PCSV (Purge control solenoid valve)
connector (C).
|

| 5. |
Disconnect the ETC (Electronic throttle control) connector (A)
and the MAPS (Manifold absolute pressure sensor) & IATS (Intake air
temperature sensor) connector (B).
|
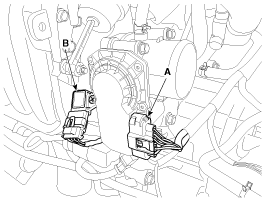
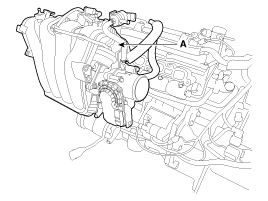
| 6. |
Disconnect the knock sensor connector (A).
|
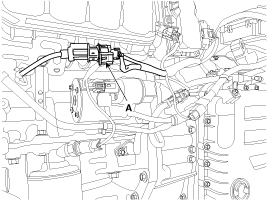
| 7. |
Disconnect the PCV (Positive crankcase ventilation) hose (A) and
the PCSV (Purge control solenoid valve) hose (B).
|
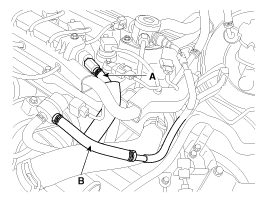
| 8. |
Disconnect the vacuum hose (A) and the throttle body coolant hoses
(B).
|

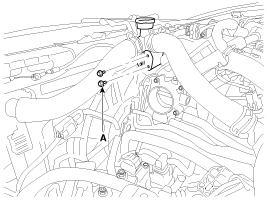
| 9. |
Unfasten the filler neck assembly mounting bolts (A).
|
| 10. |
Remove the intake manifold (A) with the gasket (B).
|

| 11. |
Installation is reverse order of removal.
|
 Intake Manifold: Components
1. Intake manifold
2. Intake manifold gasket
3. Electronic throttle body gasket
4. Electronic throttle body
5. Bracket
...
 Exhaust Manifold: Components
1. Heat protector
2. Exhaust manifold
3. Exhaust manifold gasket
4. Exhaust manifold stay
...
See also:
Fluid Components Location
1. Injection hole(eyebolt)
2. Oil level plug
3. Oil drain plug
...
Installation
ŌĆó
Install the component with the specified torques.
ŌĆó
...
Starting the engine
WARNING - Proper footwear
Always wear appropriate shoes when operating your vehicle. Unsuitable shoes
(high heels, ski boots, sandals, etc.) may interfere with your ability to use the
brake and a ...
Categories
- Kia Rio Manuals Home
- Kia Rio YB 2017-2026 Owners Manual
- Kia Rio YB 2017-2026 Service Manual
- Kia Rio UB 2012-2017 Owners Manual
- Kia Rio UB 2012-2017 Service Manual
- Downloads

Copyright ® www.kirmanual.com 2014-2026