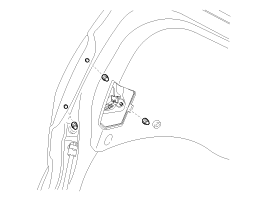
 Kia Rio: Rear combination lamp Removal
| Rear combination lamp (Inside) |
[4 Door]
| 1. |
Disconnect the negative (-) battery terminal.
|
| 2. |
Remove the trunk trim.
(Refer to the BD group - "Trunk")
|
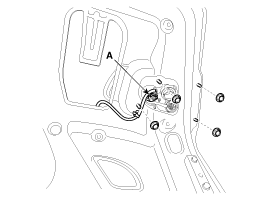
| 3. |
Remove rear combination lamp after removing the mounting nuts
(4EA) and disconnecting the connector (A).
|
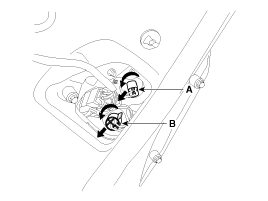
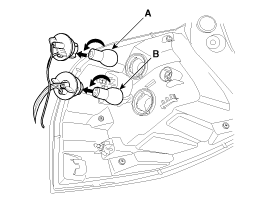
| 4. |
Remove the tail lamp bulb (A) and backup lamp bulb (B) after turning
in the counterclockwise direction.
|
| 5. |
If necessay to remove the bulb, remove the bulb after removing
the trunk trim
|
[5 Door]
| 1. |
Disconnect the negative (-) battery terminal.
|
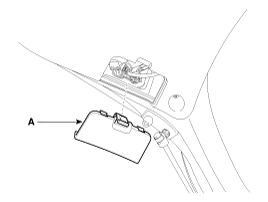
| 2. |
Remove the lamp cover (A).
|
| 3. |
Remove rear combination lamp after removing the mounting nuts
(3EA) and disconnecting the connector (A).
|
| 4. |
Remove the tail lamp bulb (A) and backup lamp bulb (B) after turning
in the counterclockwise direction.
|
| 5. |
If necessay to remove the bulb, remove the bulb after removing
the lamp cover.
|
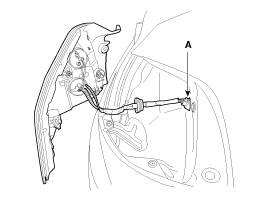
| Rear combination lamp (Outside) |
[4 Door]
| 1. |
Disconnect the negative (-) battery terminal.
|
| 2. |
Remove rear combination lamp after removing the mounting nuts
(4EA) and disconnecting the connector (A).
|
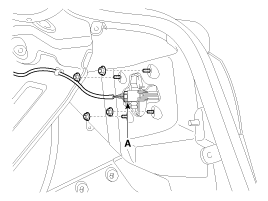
| 3. |
Remove the turn signal lamp bulb (A) and tail/ stop lamp bulb
(B) after turning in the counterclockwise direction.
|
| 4. |
If necessary to remove the bulb, remove the bulb after pulling
the trim cover aside.
|
[5 Door]
| 1. |
Disconnect the negative (-) battery terminal.
|
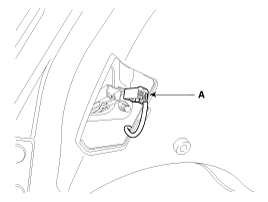
| 2. |
Remove the rear combination lamp (A) after removing the mounting
screws.
|
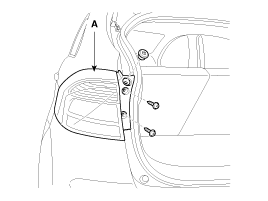
| 3. |
Disconnect the rear combination lamp connector (A).
|
| 4. |
Remove the turn signal lamp bulb (A) and tail/ stop lamp bulb
(B) after turning in the counterclockwise direction.
|
| 5. |
If necessary to remove the bulb, remove the bulb after pulling
the trim cover aside.
|
 High Mounted stop lamp Installation
[4 Door]
1.
Install the high mounted stop lamp assembly.
2.
Install the package tray trim.
3.
Connect the n ...
 Rear combination lamp Installation
Rear combination lamp (Inside)
[4 Door]
1.
Install the rear combination lamp assembly.
2.
Connect the rear combination connecto ...
See also:
Inspection
1.
Turn the ignition switch OFF.
2.
Disconnect the CCV connector.
3.
Measure resistance between the CCV termina ...
Multimedia Jack Installation
1.
Install the multimedia jack.
2.
Connect the multimedia jack connector.
...
Water pump: Troubleshooting
Water Pump
Symptoms
Possible Causes
Remedy
Coolant leakage
ŌĆó
From the bleed hole of the water pump
...
Categories
- Kia Rio Manuals Home
- Kia Rio YB 2017-2026 Owners Manual
- Kia Rio YB 2017-2026 Service Manual
- Kia Rio UB 2012-2017 Owners Manual
- Kia Rio UB 2012-2017 Service Manual
- Downloads

Copyright ® www.kirmanual.com 2014-2026