
 Kia Rio: Hood Replacement
Hood Assembly Replacement
|

| 1. |
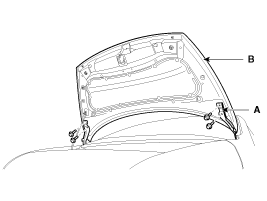
After loosening the hood hinge (A) mounting bolts, and then remove
the hood (B).
|
| 2. |
Installation is the reverse of removal.
|

Hood Insulator Pad Replacement
| 1. |
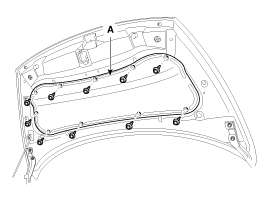
Using a clip remover, detach the clips, and remove the hood insulator
pad (A).
|
| 2. |
Installation is the reverse of removal.
|
Hood Weatherstrip Replacement
| 1. |
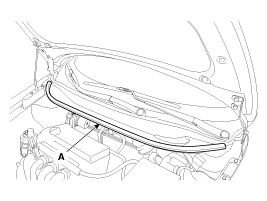
Remove the hood weatherstrip (A).
|
| 2. |
Installation is the reverse of removal.
|
Hood Release Handle Replacement
| 1. |
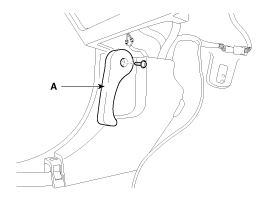
After loosening the mounting screw, then remove the hood release
handle (A).
|
| 2. |
Installation is the reverse of removal.
|
Hood Latch Replacement
| 1. |
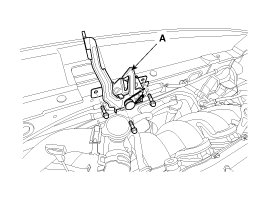
Remove the hood latch (A) mounting bolts.
|
| 2. |
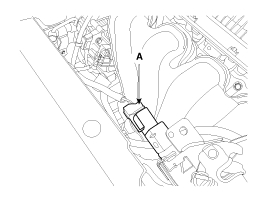
Disconnect the hood latch connector (A).
|
| 3. |
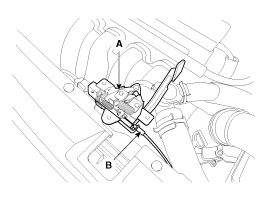
Disconnect the hood latch cable (B) and remove the hood latch
(A).
|
| 4. |
Installation is the reverse of removal.
|
 Fender Replacement
•
When removing and installing the fender, an assistant
is necessary.
...
 Hood Adjustment
Hood Adjustment
1.
After loosening the hinge (A) mounting bolt, adjust the hood (B)
by moving it up or down, or right or left.
2.
Adjus ...
See also:
Fuel requirements
Your new Kia vehicle is designed to use only unleaded fuel having a pump octane
number ((R+M)/2) of 87 (Research Octane Number 91) or higher.
Your new vehicle is designed to obtain maximum performa ...
Installation
1.
Installation is in reverse order of removal.
...
ECM Problem Inspection Procedure
1.
TEST ECM GROUND CIRCUIT: Measure resistance between ECM and chassis
ground using the backside of ECM harness connector as ECM side check
point. If the problem is fo ...
Categories
- Kia Rio Manuals Home
- Kia Rio YB 2017-2026 Owners Manual
- Kia Rio YB 2017-2026 Service Manual
- Kia Rio UB 2012-2017 Owners Manual
- Kia Rio UB 2012-2017 Service Manual
- Downloads

Copyright © www.kirmanual.com 2014-2026