
 Kia Rio: Cleaning
| 1. |
Make sure the ignition switch and all accessories are in the OFF
position.
|
| 2. |
Disconnect the battery cables (negative first).
|
| 3. |
Remove the battery from the vehicle.
|

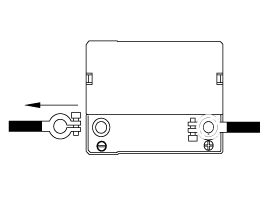
| 4. |
Inspect the battery tray for damage caused by the loss of electrolyte.
If acid damage is present, it will be necessary to clean the area with
a solution of clean warm water and baking soda. Scrub the area with
a stiff brush and wipe off with a cloth moistened with baking soda and
water.
|
| 5. |
Clean the top of the battery with the same solution as described
above.
|
| 6. |
Inspect the battery case and cover for cracks. If cracks are present,
the battery must be replaced.
|
| 7. |
Clean the battery posts with a suitable battery post tool.
|
| 8. |
Clean the inside surface of the terminal clamps with a suitable
battery cleaning tool. Replace damaged or frayed cables and broken terminal
clamps.
|
| 9. |
Install the battery in the vehicle.
|
| 10. |
Connect the cable terminals to the battery post, making sure tops
of the terminals are flush with the tops of the posts .
|
| 11. |
Tighten the terminal nuts securely.
|
| 12. |
Coat all connections with light mineral grease after tightening.
|
 Vehicle parasitic current inspection
1.
Turn the all electric devices OFF, and then turn the ignition
switch OFF.
2.
Close all doors except the engine hood, and then lock all d ...
 Troubleshooting
...
See also:
Foot Actuator (With Auto Defogging System) Replacement
1.
Disconnect the negative (-) battery terminal.
2.
Remove the glove box housing.
(Refer to BD group - “Crash pad”)
...
Audio Remote Control Removal
1.
Disconnect the negative (-) battery terminal.
2.
Remove the driver airbag module.
(Refer to the RT group - "DAB and Clock spring ...
Sub Frame Replacement
1.
Remove the front wheel & tire.
Tightening torque :
88.3 ~ 107.9N.m(9.0 ~ 11.0kgf.m, 65.1 ~ 79.6lb-ft)
...
Categories
- Kia Rio Manuals Home
- Kia Rio YB 2017-2026 Owners Manual
- Kia Rio YB 2017-2026 Service Manual
- Kia Rio UB 2012-2017 Owners Manual
- Kia Rio UB 2012-2017 Service Manual
- Downloads

Copyright © www.kirmanual.com 2014-2026