 Kia Rio: Rear Bumper Replacement
| [5 Door] |
|

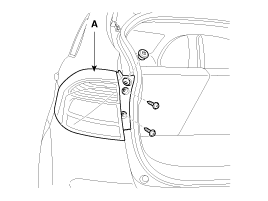
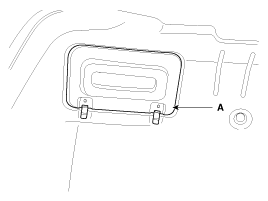
| 1. |
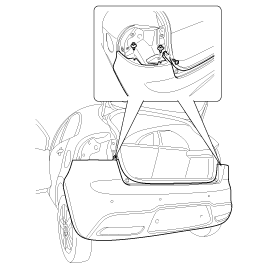
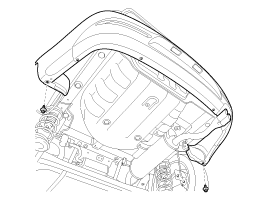
After loosening the mounting screws, then remove the rear combination
lamp (A).
|
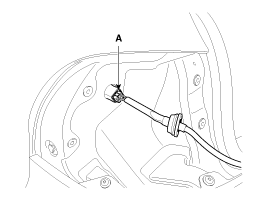
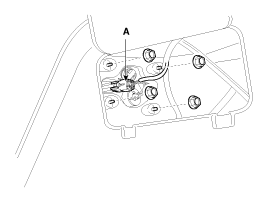
| 2. |
Disconnect the rear combination lamp connector (A).
|
| 3. |
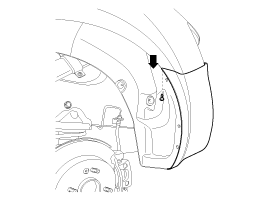
After loosening the rear bumper sideŌĆÖs mounting screws, then disconnect
the sideŌĆÖs.
|

| 4. |
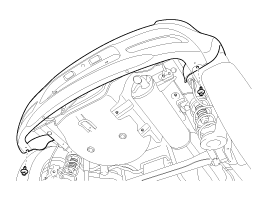
Remove the rear bumper after pull out the rear bumper.
|
| 5. |
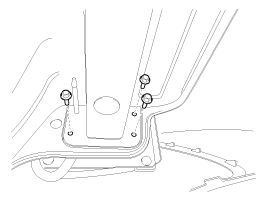
Loosen the rear bumper lower mounting bolts.
|
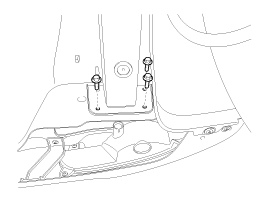
| 6. |
Loosen the rear bumper lower mounting clips.
|
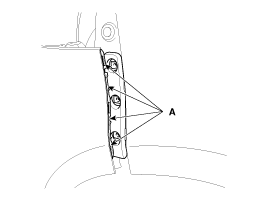
| 7. |
Loosen the rear bumper side mounting screw and clips.
|
| 8. |
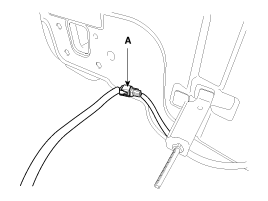
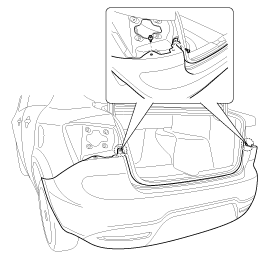
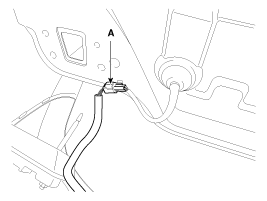
Push the lock pin, disconnect the rear bumper main connector (A).
|
| 9. |
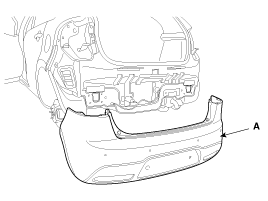
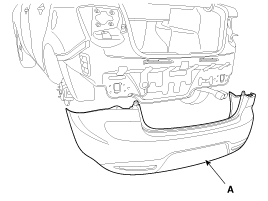
Remove the rear bumper cover (A).
|
| 10. |
Installation is the reverse of removal.
|

| [4 Door] |
|
| 1. |
Remove the rear combination lamp service hole (A).
|
| 2. |
Disconnect the connector (A) and then loosening the rear combination
lamp mounting nuts.
|
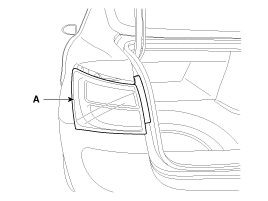
| 3. |
Remove the rear combination lamp (A).
|
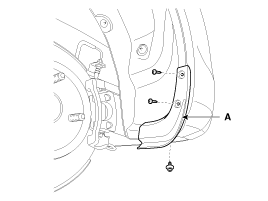
| 4. |
After loosening the mounting clip and screws, then remove the
rear mud guard (A).
|
| 5. |
After loosening the rear bumper sideŌĆÖs mounting screw, then disconnect
the sideŌĆÖs.
|
| 6. |
Loosen the rear bumper lower mounting clips.
|
| 7. |
Loosen the rear bumper lower mounting bolts.
|
| 8. |
Loosen the rear bumper side mounting screw and clips.
|
| 9. |
Push the lock pin, disconnect the rear bumper main connector (A).
|
| 10. |
Remove the rear bumper cover (A).
|
| 11. |
Installation is the reverse of removal.
|
 Rear Bumper Components
[5 Door]
1. Rear bumper cover
2. Rear bumper side bracket [RH]
3. Rear bumper side bracket [LH]
4. Rear bumper side under cover
[4 Door]
...

See also:
Specification
[AMS type (NON-OAD)]
Item
Specification
Rated voltage
13.5V, 90A
Speed in use
1,000 ~ 18,000 rpm
Voltage regulator
IC ...
AGM Battery: Specification
Item
Specification
Model type
AGM 70L-DIN
Capacity [20HR/5HR] (AH)
70/56
Cold Cranking Amperage (A)
760 (SAE) / 610 (EN)
...
Removal
1.
Disconnect the brake fluid level switch connector, and remove
the reservoir cap.
2.
Remove the brake fluid from the master cylinder res ...
Categories
- Kia Rio Manuals Home
- Kia Rio YB 2017-2026 Owners Manual
- Kia Rio YB 2017-2026 Service Manual
- Kia Rio UB 2012-2017 Owners Manual
- Kia Rio UB 2012-2017 Service Manual
- Downloads

Copyright ® www.kirmanual.com 2014-2026